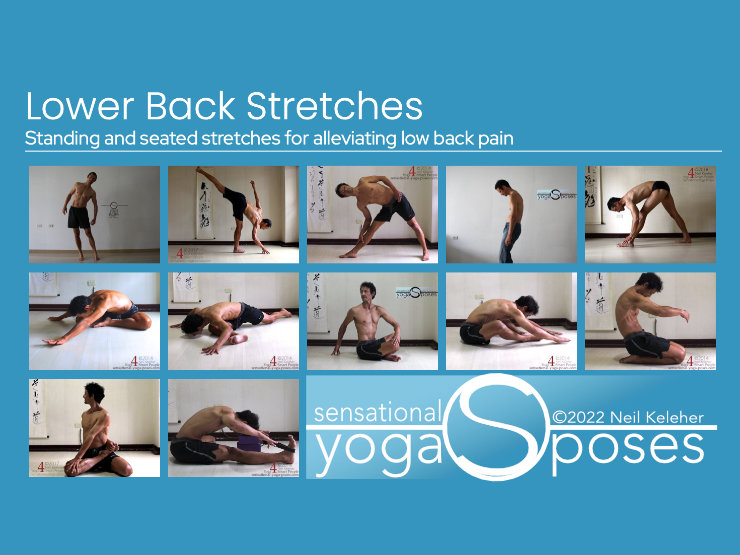
Lower Back Stretches, TOC
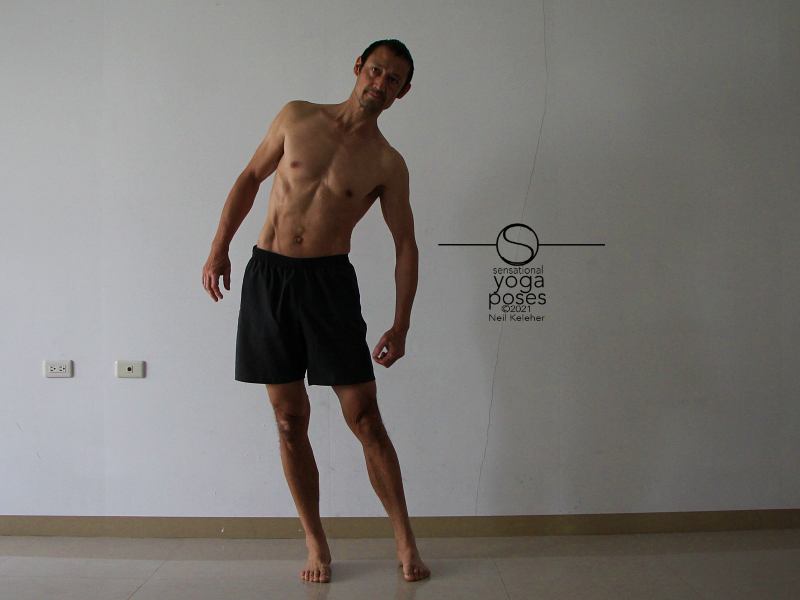
Side bend
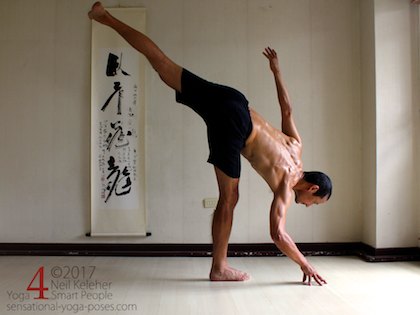
Half moon
Triangle pose
Standing slouch
Triangle pose front bend
Spinal side bend bent forwards
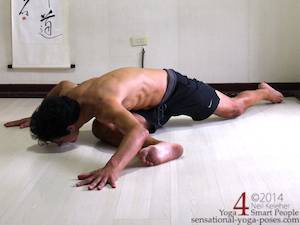
Pigeon pose forward bend
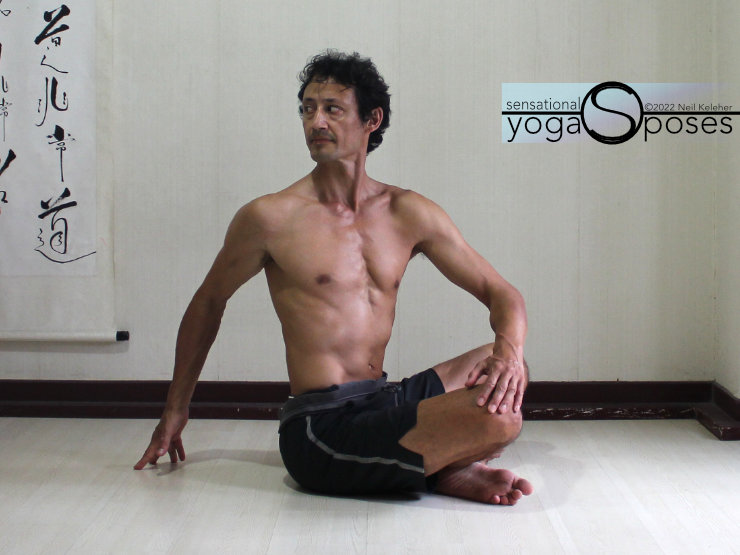
Seated twist
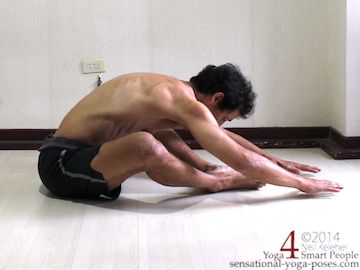
Bound angle pose
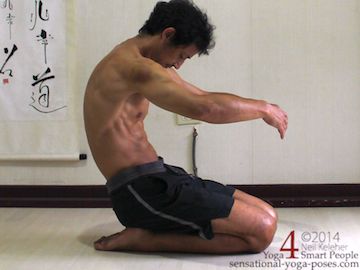
Bent back hero pose
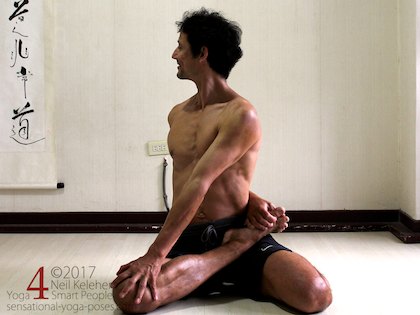
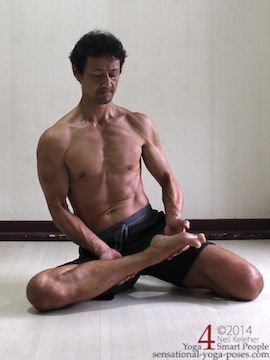
Bharadvajasana
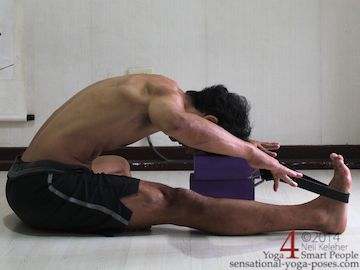
Front bend lotus counterpose
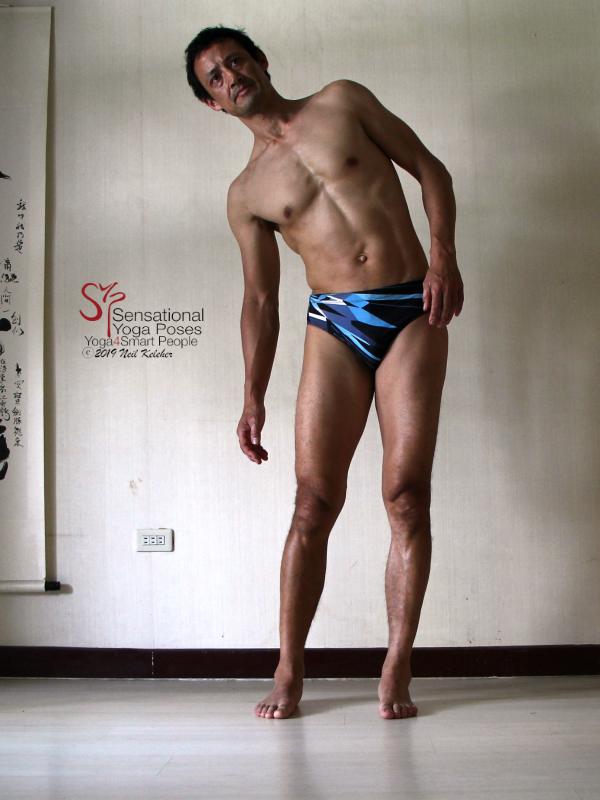
One of the easiest ways to stretch the lower back is with a standing side bend.
Stand with feet about hip width apart.
Keep your hips over your feet and bend your lumbar and thoracic spine to one side (Below left). So that the weight of your head helps to deepen the stretch, keep your neck straight (lengthen both sides of the neck equally.)
To help increase the stretch try lifting your back ribs.
To vary the lower back stretch try moving your sacrum downwards (and pubic bone upwards) so that your lower back flattens.
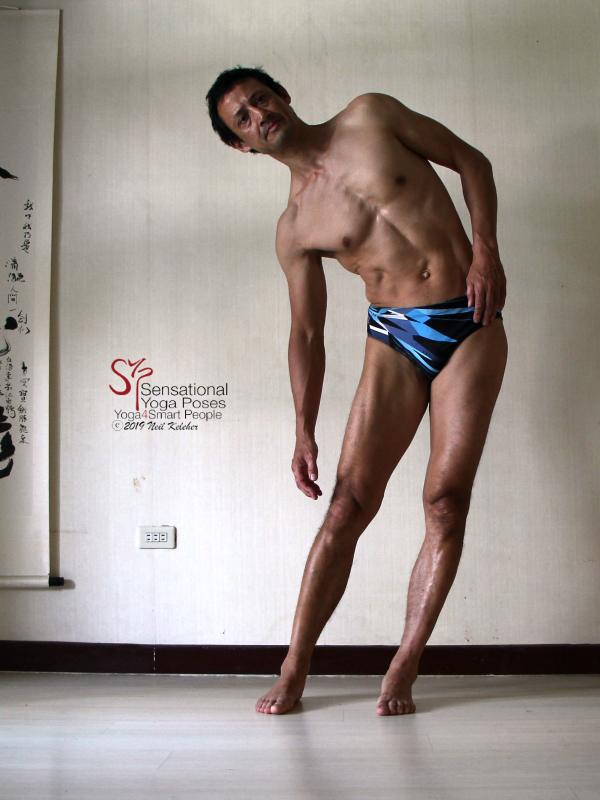
An additional way to vary the stretch is to push your hips in the opposite direction to which you are bending. If you are bending to the right then push your hips to the left, relative to your feet (above right).
Try both positions and use the one that feels best on any given day.
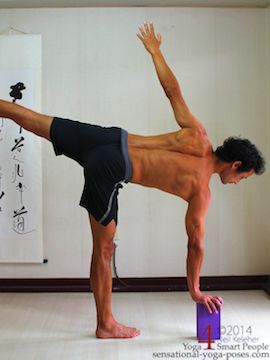
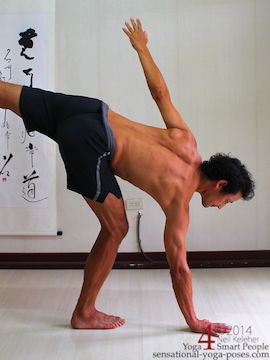
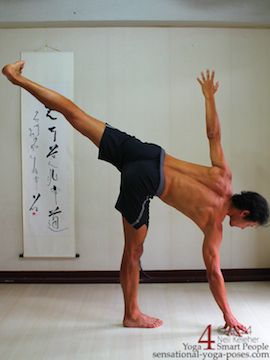
I often tend to follow a standing side bend with half moon pose (which I also call "side balance pose" if the hand isn't touching the floor.)
This could be thought of as a strengthening pose for the side of the body, however I find that I sometimes get the equivalent of a chiropractic adjustment in this pose, perhaps because of the weight of the lifted leg.
Facing the front, stand with one foot turned out 90 degrees. Shift your weight onto that foot and lift the other leg. Roll the top hip back so that your pelvis (and ribcage) both face the front.
You can reach the bottom hand to the floor.
If you can't reach the floor then use a yoga block or some other prop or just bend your standing leg knee..
See if you can just touch your hand to the floor (via a yoga block if required) without shifting weight onto the hand.
Reach the uppermost arm upwards.
When doing half moon pose focus on:
- Keeping the supporting leg strong.
- Using the hip muscles of the supporting leg to tilt the pelvis.
- Use the tilting of the pelvis to lift your leg higher and bring your bottom hand closer to the floor.
- Align your torso and lifted leg with the supporting foot so that all are in the same plane.
So that you target the lower back try lifting or lowering the ribcage relative to the pelvis to bend the lumbar spine upwards or downwards. You can also try flattening the low back (or do the opposite and increase the arch of the lumbar spine). In each case work towards finding an effective stretch lower back or work at stabilizing both it and the hip of the standing leg.
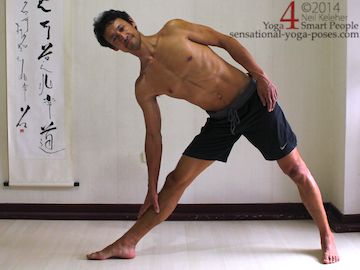
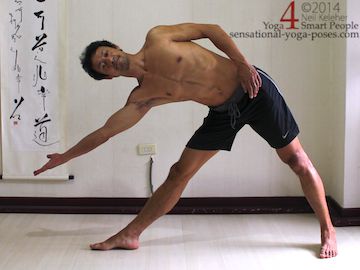
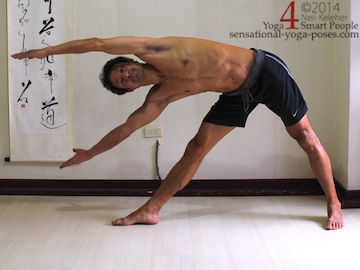
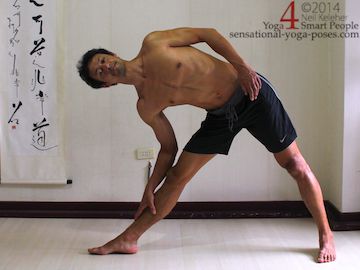
For a resisted lateral lower back stretch I like to use this unsupported trikonasana (triangle pose) variation.
Standing with the feet apart, turn the "away-from foot" slightly inwards and the "towards foot" outwards 90 degrees. The towards foot is the foot you will be tilting towards.
- Drop the hip on the towards foot side so that it is lower than the away-from foot hip.
- Reach the hand on the towards foot side down the leg and rest it on the shin.
- Slowly bend the elbow so that the ribcage sinks down.
- Press the fronts of both feet into the floor and brace your knees. Then slowly lift your hand off of the leg and reach it to the side.
- Optionally reach the other hand to the side also.
- Hold this position and let your ribcage gradually move closer to your thigh.
When standing back up try to keep the knees straight and the arms reaching past the head. This is to help strengthen the muscles being stretched.
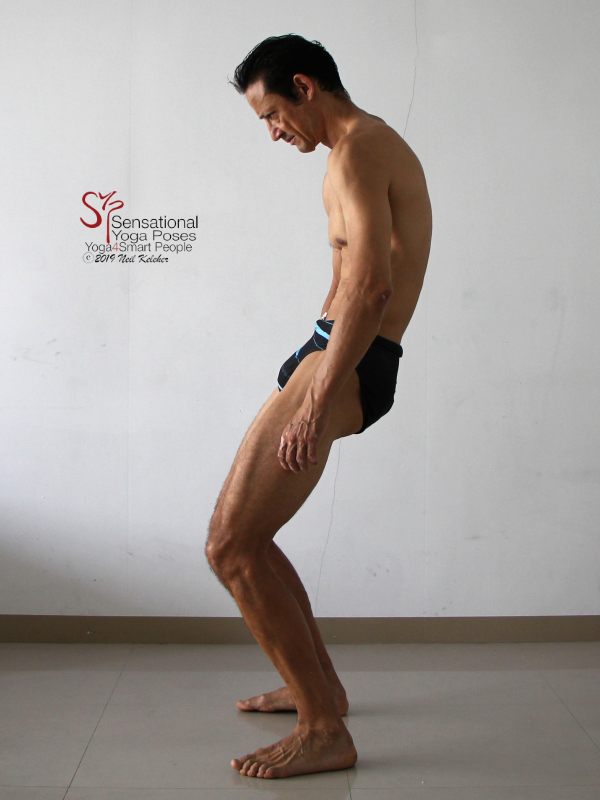
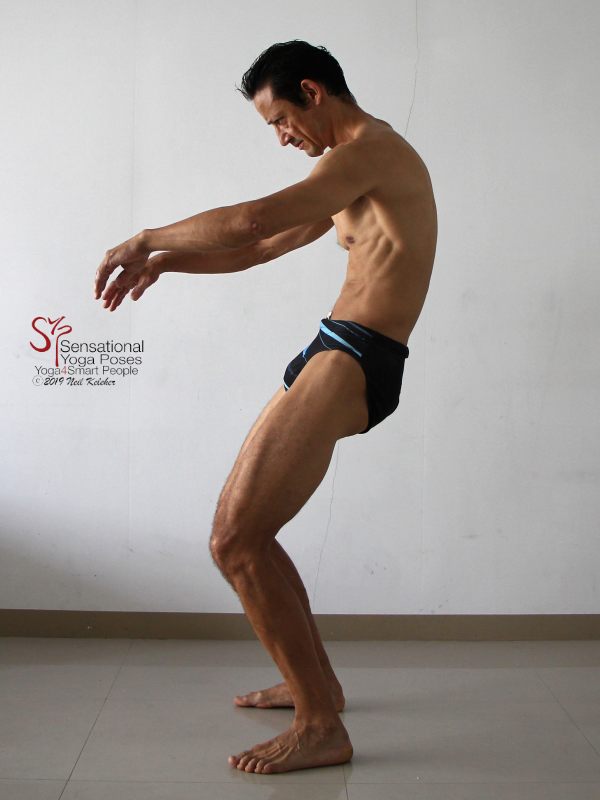
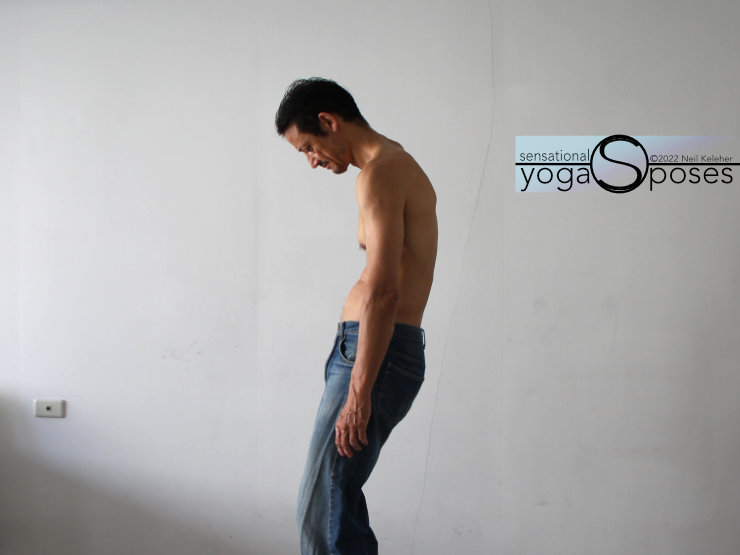
A more direct lower back stretch is to slouch while standing:
- Stand with feet hip width and outer edges parallel.
- Bend your knees slightly.
- Move your ribcage backwards relative to your pelvis.
- At the same time let your sacrum sink down and allow your pubic bone to move up.
- Reach your hands forwards for balance.
In this lower back stretch the lumbar spine is rounded, stretching the muscles that run up the back of it. It is also a resisted stretch for the psoas, since the psoas activates in this position to help support the lumbar spine from the front.
You could activate your abs to assist the lower back stretch. I'd suggest pulling your belly in prior to rounding your back.
- Actively pull your pubic bone upwards and pull your sternum downwards to activate your rectus abdominus muscle.
- Pull back on the points at the fronts of the hip crests and on the bottom corners of the front of your ribcage to activate external obliques.
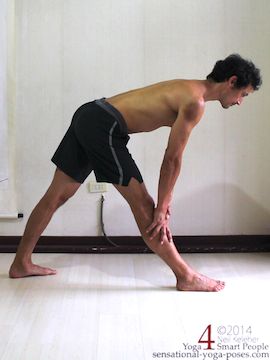
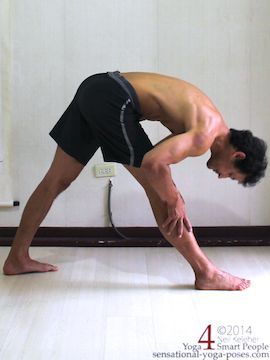
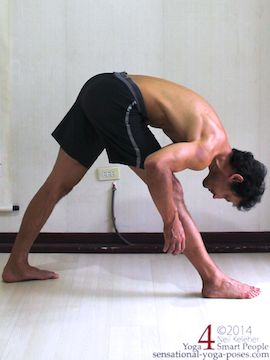
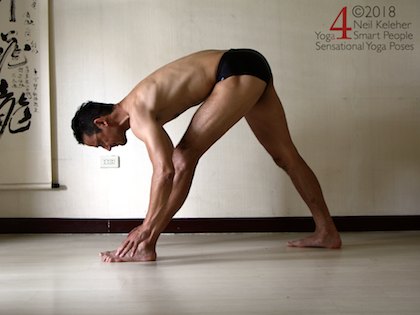
Another way to alternately stretch and then strengthen both the lower and upper back is to use this standing asymmetrical hamstring stretch. (It could which could be called "triangle pose forward bend" or parsvottanasana)
- Stand with one leg forwards and the other leg back.
- Turn your hips square to the front (the direction your front foot is pointing in.)
- Adjust the position of the back foot so that your back heel can rest on the floor with the knee straight.
You may find that your back knee tends to roll inwards. I'd suggest keeping the hips square the to front and roll the rear shin outwards so that the inner arch lifts and so that the knee also rolls slightly outwards.
- Keeping your shin rolled outwards press the inner edge of the front of the foot into the floor.
Bend forwards and place your hands on your shin, or on a chair or on the floor.
Check that your pelvis is still level from side to side so that the right hip is at the same height as the left hip. Also check that your hips are square to the front.
From here, slowly press the front of your front foot into the floor.
- Brace your front leg, bend your thoracic spine backwards and reach your chest forwards, away from your pubic bone. Lift your hands off of your leg or the floor or the chair (or whatever support you are using.)
This spinal action is the opposite of the standing spinal forward bend you did earlier.
Next relax in stages.
- Let your chest sink down, put your hands on a support and press them into the support to support your upper body. Relax your hips.
Gradually bend the elbows to allow your chest to sink more.
To add weight to the lower back stretch slowly relax your arms and take your hands off of your leg (or off of the floor) while keeping your spine bent forwards.
Move slowly so that you can stop at any point you feel back pain.
If you can't lift your hands without causing pain, then keep using your hands to support the weight of your upper body.
Repeat the phases of this lower back exercise (open the chest then relax) a few times, moving slowly and smoothly.
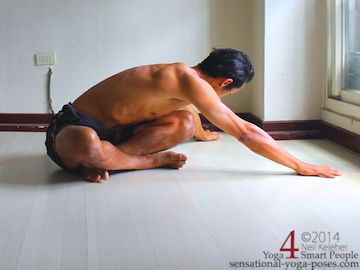
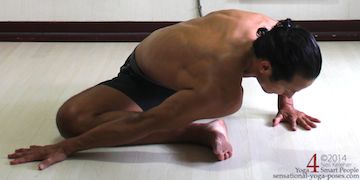
While sitting, another way to side bend is sit cross legged and bend forwards and then reach the arms and torso to one side.
If bending to the right, you can allow the left hip to lift to begin with, and then as you edge deeper into the side bend, push the hip down.
Try to turn the ribcage and belly so that they both face the ground. Reach with both arms. Work at lengthening your spine and arms while staying as relaxed as possible.
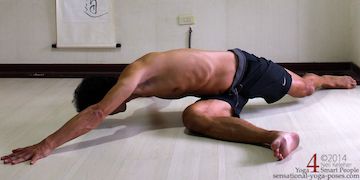
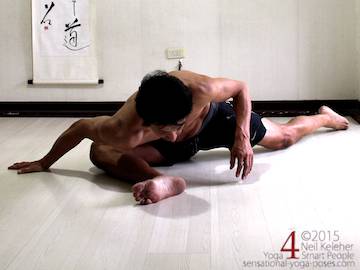
A similar stretch but a little more intense lower back stretch and hip stretch is screaming pigeon side bend.
From the cross legged position swing one leg back. If you have your right leg forwards then sit the right hip on the floor and position the right shin parallel to the front of your mat. Reach the back leg rearwards parallel to the side of your mat.
To begin with let your chest sink down onto your front thigh. Relax both sides of your ribcage down. Notice any tension or pressure in your arms, and relax you arms gradually to let your ribcage sink down. If you are resting on your elbows then slowly move your elbows to the side to let your ribcage sink down.
Next, move you ribcage to the right, and try to get your left shoulder past your right knee. Let both sides of your ribcage sink down.
You may find that in this position it feels better to place the inner edge of your back foot on the floor so that the back knee points outwards.
Hold for about a minute then move back to center.
Next use your right hand to push your ribcage to the left. Reposition your right hand so that you can continue to use it to push your ribcage to the side.
Try to get your right shoulder to your right foot while at the same time sinking both sides of the ribcage downwards evenly.
Repeat on the other side.
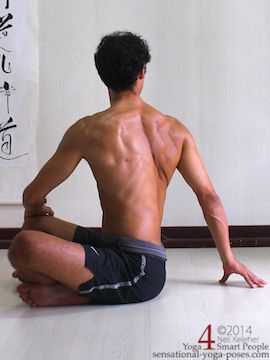
Next you may find that a simple twist can act as an upper and lower back stretch.
Sit with your feet crossed and turn to the right.
Rest your left hand on your right knee and place your right hand on the floor behind you. Use your arms to twist and turn your ribcage.
To vary the sensation in your lower back, try changing or varying the front to back tilt of your pelvis.
Try tilting your pelvis rearwards and then forwards while allowing your lumbar spine to bend forwards and backwards.
While twisting to the right try pulling forwards and downwards on the left side of your lumbar spine (to activate the psoas.)
Pull back and up on the right side of your lumbar spine.
Repeat on the other side. If you lower back feels uncomfortable while twisting or if one side is easier try changing the cross of your legs. As an example try twisting to the right with your left leg crossed in front of the right then change the cross of your legs when twisting to the left. Then try the reverse.
In addition, try lifting one side of the ribs and then the other, moving the sides of the ribs away from the pelvis to see if that gives you a better feeling back stretch.
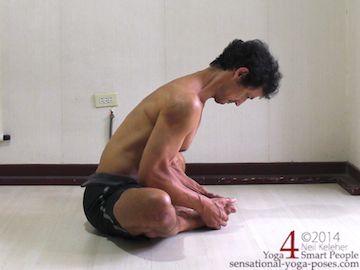
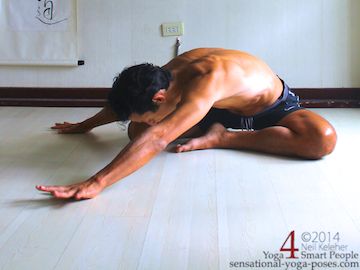
Another lower back stretch that can also be used to stretch the outer thighs and then the inner thighs is bound angle.
Bound Angle Back Stretch with Feet Away from the Pelvis
To begin with bring the feet together while sitting but move the feet about a foot and a half to two feet away from the pelvis so that the knees are bent about 90 degrees.
Turn the fronts of the soles of the feet upwards so that the inner edges of the fronts of the feet move away from each other. Keep the heels together.
Slowly bend forwards and as you do press the sides of your heels into the floor. You can also experiment with pressing the fronts of the sides of the feet into the floor. Move your hands forwards along the floor. Allow your spine to bend forwards but pull your head forwards, away from your ribcage so that your neck is long. Keep your feet pressing downwards.
You can try adjusting the amount of bend in your lumbar spine. If you find a dull ache or slight discomfort try rounding your lumbar spine or try to straighten it. See if you can find the amount of bend that feels good (and safe.)
To increase the stretch slowly pull upwards on your arms and even lift your hands off of the floor.
Slowly sit up (pressing your feet down as you do so).
Bound Angle Hip and Back Stretch with Feet Close to the Pelvis
For the next version of this lower back stretch, bring your feet closer to your pelvis.
Here again press the sides of your feet into the floor and spread the inner edges of the feet.
Sit upright and press your feet down (so that your knees also move down) and when you are ready bend forwards. Keep the feet pressing down and gradually reach your hands forwards. Pull your head forwards, away from your ribcage keeping your neck long.
Optionally, grab the feet and use your arms to pull your ribcage towards your feet. Keep pressing the feet down as you do so.
Try rounding the spine (use your abs) and then straightening the spine and opening your chest (using your spinal erectors.) Try moving slowly and smoothly between these two actions.
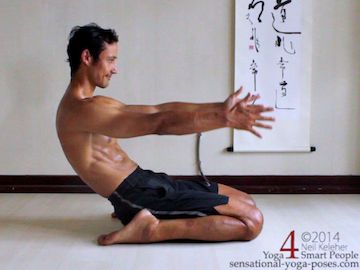
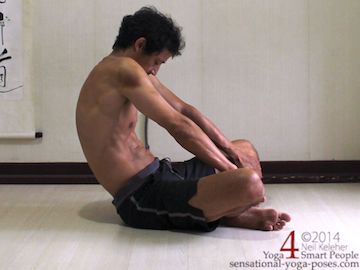
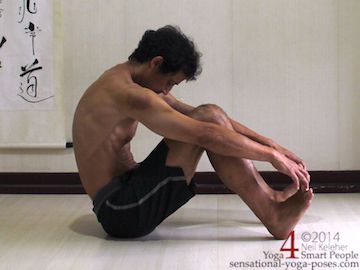
Another upper and lower back stretch I learned from Andrey lappa is bent back hero. It is a nice way to work towards full reclining hero pose.
Kneel with feet and knees together. Move your ribcage backwards and as you do so let your sacrum move downwards and your pubic bone move upwards. Your head can move forwards and down for a more completely forward bent spine. Reach the arms forwards for balance.
If you are comfortable in hero pose then separate your heels and let your butt touch the floor between your feet. Here again round the spine. Push your ribcage backwards, move your pubic bone upwards and your sacrum downwards.
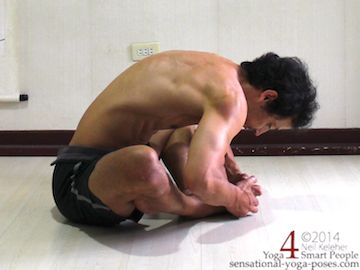
If kneeling is uncomfortable you can do a similiar stretch with the legs crossed. Grab on to the shins and sink your ribcage backwards. The feeling is like you are hanging from your shins.
One other leg option (that I can think of) is to sit with feet on the floor and knees bent upwards. Grab the toes and fronts of the feet and let your ribcage hang back and down. The more you round your back and bend your spine forwards the more this becomes stretches the lower back.
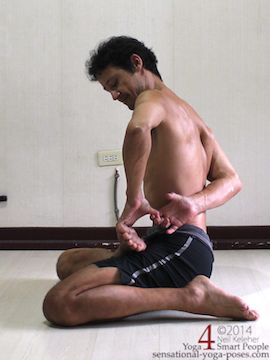
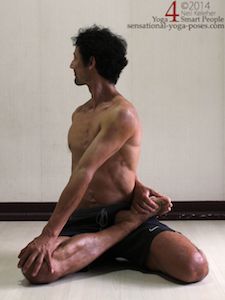
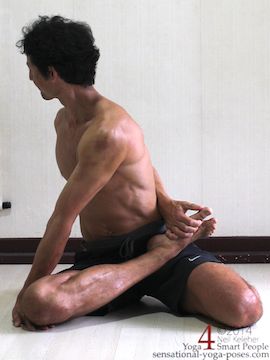
A slightly challenging lower back stretch is called bharadvajasana or "combined hero lotus seated binding twist".
Alas it requires the use of half lotus for best results. So if you have painful knees leave this one out.
From a seated kneeling position move your hips to the right. Place your right foot against the inner thigh of your left foot. Keep your right hip on the floor, the left hip can be lifted.
Hook both hands under the right shin (from the rear). Pull the shin upwards off of the floor but at the same time press the shin down against your hands. Press down with just enough pressure so that the right hip has some tension. Make the right foot and ankle active also (think "stiff").
Slowly move position the ankle and outer edge of the right foot in the crease of the left thigh. Work towards this gradually. For example, place it mid thigh, rest and get used to this position. Then move the foot closer to the crease of the thigh. Rest, and then repeat.
Once the foot is seated in the crease of the left thigh, adjust the position so that the toes are close to the outer edge of the thigh. Keep the foot and ankle active and use the hip muscles to press the foot into the thigh. Adjust foot position for comfort (you may find the foot presses uncomfortably into the thigh. You may find that you only need a small adjustment in position to make it comfortable.)
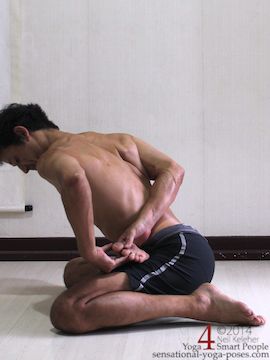
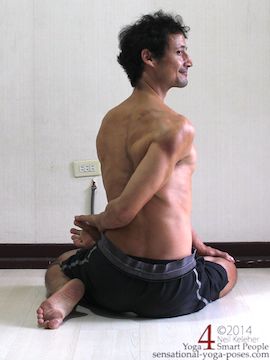
With your right foot in lotus turn to the right. Reach your right hand behind your back and grab on the right foot.
This is the action that causes the back stretch since your forearm will then press into the side of the lower back causing the lower back to release (more than likely the quadratus lumborum.)
If you have difficulty binding then first hook the right foot with the fingers of the left hand. Reach the left thumb rearwards. Try to grab the right thumb with the left hand from behind the back. You can hold this position or wok your right hand along your left hand until it reaches the right foot.
While binding or simulating a bind, pull your hand rearwards and pull your foot forwards as if they are trying to pull away from each other. This dual action be used to bring the heel into the belly but also to tighten the bind.
Turn your ribcage to the right. You can rest your left hand on the right knee or on the floor below it.
Press down with the left hand to help lift and turn the left side of the ribcage.
Turn your head and reach with your eyes, looking rearwards.
Slowly release. Rest if you need to.
Then repeat on the other side.
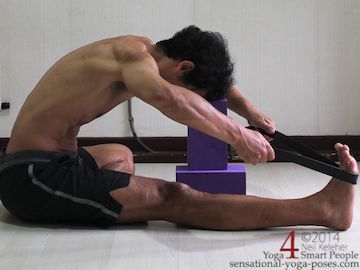
If your knees are a little sore, actively straighten the knee in janu sirsasana.
So that your back can relax (and for an additional lower back stretch), you can rest your forehead on some yoga blocks. You can also loop a strap or belt around the foot and use it to help lengthen your torso.
Sit for a few minutes with your spine long and upright. Feel your lumbar spine. Tilt your pelvis slowly back or forwards so that your lumbar spine feels comfortably long. Then feel your ribcage and thoracic spine. Try to open the spaces between the ribs at the fronts, sides and back. Then gently lift your chest so that your thoracic spine feels long. Then feel your cervical spine. Pull your head up and back but drop your chin. Make the back of your cervical spine feel open and long.
Scan again from bottom to top (or top to bottom). Look for feelings of excessive tension. Relax that tension (sink down where you need to in order to relax.) Look for a balance between space (or length) and relaxedness. Try to create maximum space without creating excessive tension in any part of the body.
Any time you need a rest or a break, sit up tall (or stand up tall with knees slightly bent) and self massage yourself into a posture of maximum length with minimal stress.
Published: 2014 05 01
Updated: 2021 01 29
