Upright Posture Practice
The following yoga posture improvement exercises are done in an upright position, either sitting or standing.
That means you can practice them anywhere whenever you have a few minutes to spare. Whether you are waiting for someone or just taking a quick break while still in front of your computer.
You can also do yoga to improve posture while waiting for your favorite beverage to arrive.
Feel and Control
So that you can feel your body and control it, work at doing the posture practice exercises smoothly and slowly.
First get the basic idea of the exercise. Once you understand what you are trying to do, then practice doing all movements slowly and smoothly. As an example, take 5 seconds to lengthen your neck, then 5 seconds to relax it.
For even better control and sensitivity work at making each movement repetition last up to 10 seconds.
That's just a guideline to get you started. The most important quality is smoothness. The idea of moving slowly is to make it easier to develop smoothness and also to help you feel your body and control it.
Breath-Like Movement Basics
In yoga the term vinyasa usually means breath linked movement, or movement with intent. The intent is that of synchronizing movement and breath. The result can be a more mindful posture practice since you have to focus on feeling your breath in order to synchronize with it.
In posture practice the focus is not on breathing but on "Breath Like" movements.
Rather than trying to breath slowly and then synching movement with that slow breath, the focus is on slow and controlled movements that are breath-like in nature.
Breath like movements are repetitive and basically consist of a lengthening movement (like an inhale) and a relaxation movement (like an exhale.)
Try to emulate a deep slow breath in your posture practice exercises. Make both the lengthening movements and the relaxation movements slow and smooth.
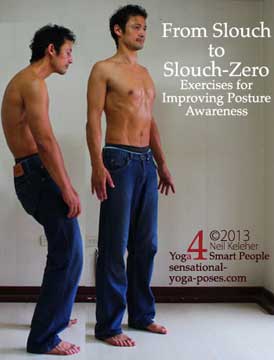
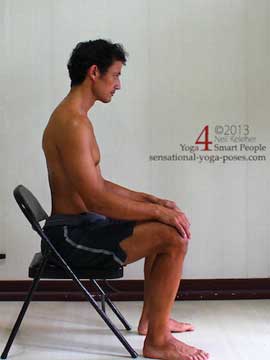
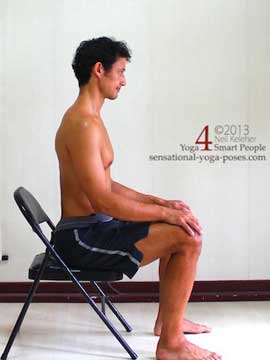
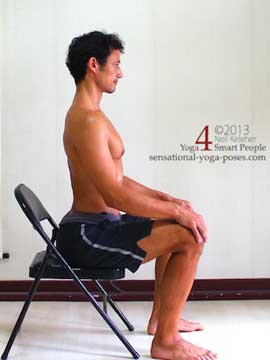
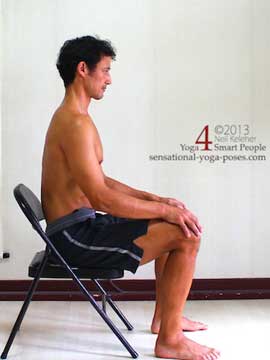
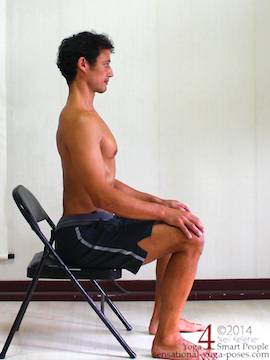
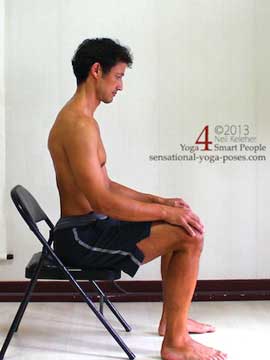
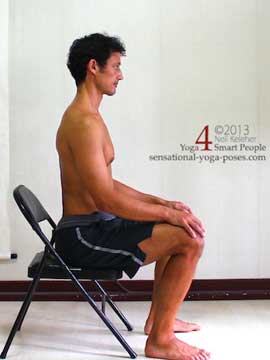
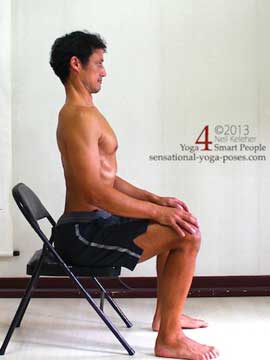
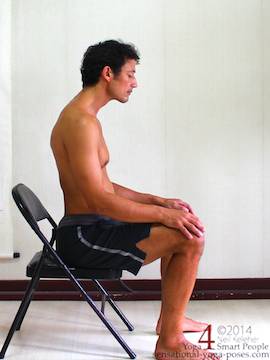
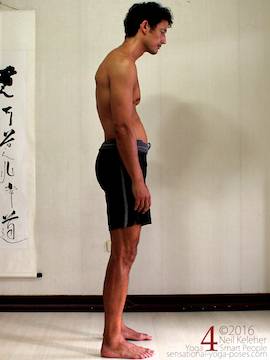
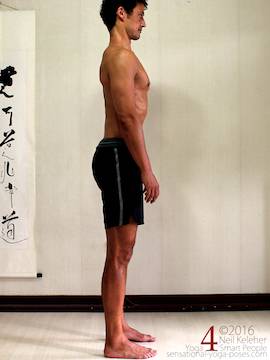
Slouch, Slouch Zero (and the Demi-Slouch)
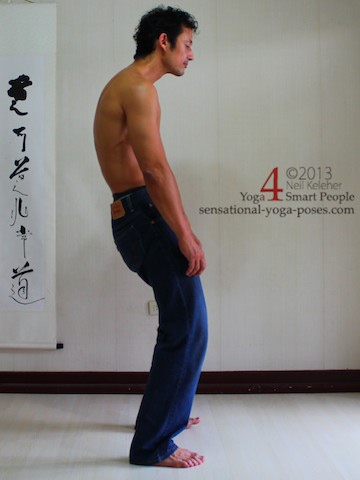
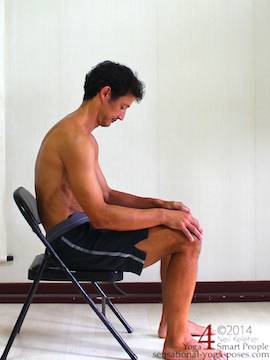
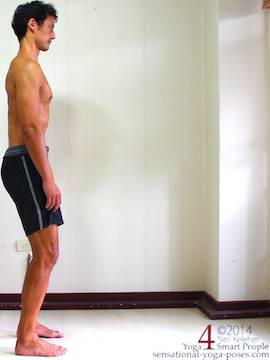
A starting position for improving posture is the slouch.
This is normally thought of as bad but we'll think of it as one of many possibilities for the spine. It is one position in which the muscles of the spine are fully relaxed. (Or as relaxed as possible.)
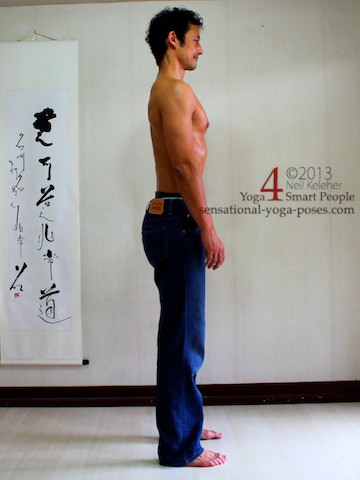
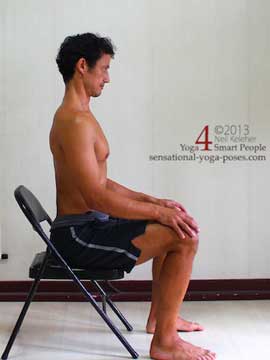
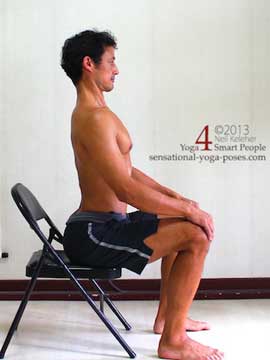
An ending position is "slouch-zero." (Above right.)
Both positions involve continuous concentration.
In the slouch the intent is to relax and sink down, to let the weight of our bones be pulled down by gravity. In the "slouch-zero" position the intent is to resist gravity, to lengthen up and away from the center of the earth.
- While relaxing the intent is to see if you can relax further, to see if you can sink deeper.
- While lengthening the intent is to see how much further you can lengthen upwards.
Both require a constant scanning awareness of the body looking for places where you can still release or still continue to lengthen.
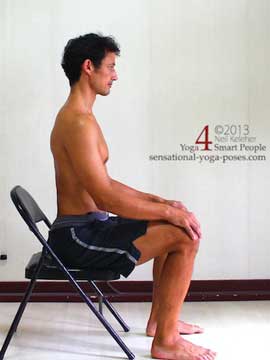
With practice it then becomes easier to find a spinal posture that is both long and relaxed at the same time, one that uses minimum effort to stay upright.
Break it Down
One of the easiest ways to practice both the slouch and slouch zero is to break the body down into elements and practice relaxing and then lengthening those elements each in relative isolation.
At any point where you can't feel a part of your spine, you can always go back to the isolation exercises and focus on just that part. Or create special isolation exercises to focus on any part of your spine (or associated bones) that you can't feel.
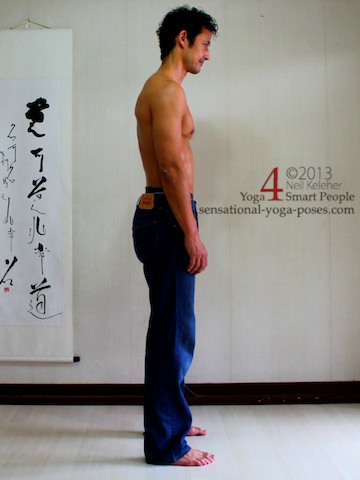
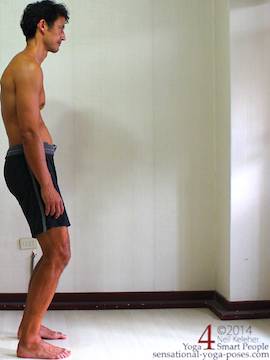
As an example, in this demi-slouch (at right) I'm focused solely on lifting my back ribs.
For more on isolation and why it's beneficial and how it isn't the goal but rather a tool for working towards limitlessness, you might be interested in my latest book, Mental models, learning how to learn. Mental models isn't a reference to crazy instagram models, it's a reference to the models that our brain builds and improves when we learn, hence the learning how to learn. The breaking things down part is an important part, but it's not the only aspect of learning to learn. The other part is practicing with a focus on direct experience. And you get a taste of that with these posture exercises by learning to feel your spine. (Actually, what you are feeling is the sensations generated as particular muscles activate (muscle activation sensation) and as connective tissue is tensioned.)
The Neck and Cervical Spine
The neck controls the relationship between the head and the ribcage. If you only had time to focus on one aspect of posture practice, I'd suggest that focusing on neck posture would pay the best dividend.
The normal tendency, (at least for myself) is for the head to move forward, mainly because of reading or working in front of computers. But also because of poor body awareness, a lot of us may not even be aware that our head is forward of our ribcage. And we might not be able to notice when our head is vertically aligned over our ribcage. The idea here is that when we can notice or better yet feel the relationship between our head and ribcage, it's that much easier to change that relationship.
Lengthening the Back of the Neck
The focus in this posture practice exercise is on lengthening the back of the neck while at the same time stacking the head over the ribcage.
If you are slouched in front of a computer while reading this, notice where your head is in relation to your ribcage.
My head is forwards and my chin is down. It feels like my head is trying to roll down the front of my ribcage.
- First pull your chin slowly down towards your sternum (chest bone).
- Then slowly pull up and back on the back of the base of your skull so that your head pulls back and up.
- Your chest may lift as you pull your head back and up.
- Relax and let your head move forwards and down again (and sink your chest.)
A simpler set of instructions involves focusing on your ear holes. Pull your ear holes back and up so that your head ends up over your ribcage. Then relax the action.
One reason for using the ear holes as references is that this tends to keep the hear relatively level from front to back.
If you were sitting with your back up against a wall the intent would be to pull the back of your head towards the wall (touch it) and then up the wall. Then when relaxing your head can move away from the wall.
Once you have a feel for the basic action work at slowly lengthening the back of your neck and then slowly releasing. (Spend about 10 seconds lengthening (or longer) and about the same relaxing.)
Using the ear holes reference, a simple instruction for the lengthening phase is to pull your ear holes up and away from the peaks of your shoulders. You could also focus on pulling your ear holes away from the top of your ribcage.
Adjusting front back head tilt
While in the lengthened position you can try adjusting the front back tilt of your head. Try slightly lifting or lowering your chin so that the back of your neck feels comfortably long. Also note, as you get more used to feeling and controlling the relationship between your head and neck, you can also adjust how far back and up you pull your head. You can start looking for a position where the back of your neck feels comfortably long.
Feeling the Cervical Spine
Once you've got the basic movement you can deepen your awareness by focusing on feeling your cervical vertebrae.
It can help to have some landmarks or reference points.
The base of the skull is about level with the ear holes. The base of the neck is about even with (or just above) the spinal process that sticks out most prominently near the base of the neck at the back of the body. You can use these two extreme points as references for feeling the vertebrae and inter-vertebral joints of the neck.
The front of the cervical spine is just behind the back of your throat. So to feel your cervical spine focus your awareness so that you feel everything between the back of your neck and the back of your throat.
The neck has seven vertebral elements. But I like to consider the skull as an extension of the spine so that in this case the neck has 8 bony elements. It then has 7 joints in all.
Knowing the number of vertebrae or joints and knowing the endpoints of the neck you can move your awareness up or down your spine while counting intervals. This can give you a rough idea of where the joints of your neck are or where the vertebrae are.
From the top down work on pulling your skull then each of the vertebrae of your neck back so that they are vertically aligned.
Starting at the joint between C1 (the uppermost cervical vertebrae) and the base of your skull, tilt your head forwards so that the back of this joint opens. Move down a level. Pull your skull, C1 and C2 back and up. Then move to C3.
The feeling as you work down your neck can be like that of '"'sucking" each vertebrae towards the back of your neck.
The feeling can also be like you are trying to create space between the back of each of the cervical vertebrae.
If your imagination can extend to visualizing or feeling the spinous processes that stick out of the back of the cervical vertebrae, then imagine creating space between adjacent spinous processes as you work your way downwards.
When lengthening the back of your neck allow your chin to move down. At the same time your chest can move up. The front of your neck is closed while the back of the neck opens.
Practice lengthening and relaxing until you get to the point where you can easily keep the back of your neck feeling open and long.
The Lower Back and Lumbar Spine
For the next set of yoga postures to improve posture, I'm jumping to the lumbar spine from the cervical spine (the neck) because learning the lumbar spine first can make it easier to then learn to feel (and control) the thoracic spine.
The lumbar spine connects the ribcage to the pelvis. Since it is difficult to isolate the pelvis from the lumbar spine, I often think of the pelvis (and sacrum) as an extension of the lumbar spine.
Posture Practice Movement Terms for the Pelvis and Spine
On occasion I might talk about rolling the pelvis forwards or backwards. In an upright position:
- Rolling the pelvis forwards results in the pubic bone moving down and the tail bone/sacrum moving up.
- Rolling the pelvis backwards results in the pubic bone moving up and the tailbone moving down.
If the spine is bending as the pelvis moves, then rolling the pelvis forwards moves the pubic bone away from the sternum. Rolling the pelvis backwards moves the pubic bone towards the sternum.
When bending the spine:
- A forward bend is where the spine bends around something imaginary that is in front of the spine.
- A backward bend is where the spine bends around something behind it.
- Likewise a bend to the right means the spine is bending around something to the right of the body.
Bending the Lumbar Spine Backwards
The first posture exercise for the lumbar spine is to get you used to feeling the pelvis and lumbar spine while bending the lumbar spine backwards.
You can sit in a kneeling position for this exercise or if that is uncomfortable try it while sitting in a chair. Sitting cross legged is also okay but that leg position can limit the movements of the pelvis.
Sitting upright move your pubic bone down and pull your sacrum up so that your pelvis tilts forwards and your lumbar spine bends backwards.
Slowly release.
You may feel some tension on either side of the back of the lumbar spine. That would be from the lumbar spinal erector muscles activating.
Counting lumbar vertebrae for spinal segmentation
The lumbar spine has five vertebrae between the sacrum and the bottom of the ribcage. As you tilt your pelvis forwards see if you can bend the lumbar spine backwards from the bottom upwards.
See if you can feel the lumbar spine bending at each joint in isolation.
To begin with try bending back at just the joint between the sacrum and the lowermost lumbar vertebrae. Release and then as you repeat the movement move up to the next inter-vertebral joint.
When you reach the top of the lumbar spine practice feeling the entire spine bending backwards smoothly.
To deepen the back bend of your lumbar spine try to gradually increase the tension along either side of the back of your spine.
Notice how that tension dissipates when you relax the back bend.
Bending the Lumbar Spine Forwards
in the next exercise for yoga to improve posture we'll do the opposite action and bend the bottom of the lumbar spine forwards.
Slowly reach down with your tailbone and focus on pulling up on your pubic bone so that your pelvis rolls backwards.
Slowly relax and return to your starting position.
Repeat and as you pull up on your pubic bone focus on feeling your lumbar spine curving forwards from the bottom upwards.
Focus on the joint between the sacrum and lowermost lumbar vertebrae. As you tilt your pelvis backwards try to tilt this lower most vertebrae backwards.
Then on the next repetition focus on this vertebrae and the one immediately above it.
If you have trouble feeling any of your lumbar vertebrae, or the joint between them, you can spend more than one repetition trying to feel that problem area.
Once you have a feel for all of the vertebrae see if you can feel your entire lumbar spine smoothly bending forwards.
Imagine that you can feel the spinous processes of the lumbar vertebrae moving away from each other.
You can also focus on feeling the low back on either side of the lumbar spine. See if you can make it feel open as you tilt your pelvis backwards.
To accentuate the forward curve of your lumbar spine focus on activating your abdominals. Use your rectus abdominus to pull up on the pubic bone. You can also focus on pulling down on your sternum.
See if you can slowly and smoothly engage your abdominals and then slowly and smoothly relax.
We'll return to the lumbar spine in a standing context after first exploring posture practice exercises for the ribcage.
Counting thoracic vertebrae for better spinal segmentation
Now lets explore the ribcage and thoracic spine.
The ribcage is made up of 12 sets of ribs attaching to the 12 thoracic vertebrae.
Ribs are numbered from the top downwards so that pair 1 is the uppermost pair. Pair 12 are the lower most. The thoracic vertebrae are also numbered from the top downwards.
We can divide the ribcage into an upper half and a lower half. The upper half has rib pairs 1 to 7 since these all attach directly to the sternum. The lower half has ribs 8 to 12. This is the part that forms the "costal" arch at the front of the ribcage.
The upper half of the ribcage, because it attaches to the sternum. It may be that this is because the shoulder blades rest on this upper part of the ribcage. The sternum gives the upper ribcage more stability so that it in turn can create a stable foundation for the shoulder blades. (And perhaps for the neck also.)
Bending the Thoracic Spine (and Lumbar Spine) Backwards
While kneeling or sitting in a chair, use the same basic posture practice exercise as for the lumbar spine. Tilt the pelvis forwards (focus on lifting the sacrum) and bend the lumbar spine backwards.
Carry the back bend up into the thoracic spine one vertebrae at a time.
Each time you bend backwards see if you can carry the backbend higher up the thoracic spine. As with the lumbar spine, try to work up the thoracic spine gradually. Try to feel it bending at each vertebral joint.
At the same time, lift and open the front of the ribcage.
To make bending the spine backwards easier you may find it helps to lift the back ribs as you bend backwards.
To deepen the back bend of your thoracic spine carry the feeling of tension along either side of the lumbar spine upwards first into the lower thoracic spine, then into the upper thoracic spine.
To use more muscle power to bend your thoracic spine backwards try to widen the band of tension along the back of the body. Moving outwards from the spine, see if you can squeeze more of your spinal erectors to help your thoracic back bend.
(You can think of the spinal erectors as having three lines of muscle running up the back of the body, each line further out from the spine. The idea is to try to activate all three lines of muscle.)
At the upper thoracic spine try to avoid squeezing your shoulder blades together. Instead try to activate the upper erector spinae muscles.
(Moving the shoulders back can make the chest appear open. However, this appearance of "opening" is created by moving the shoulders back relative to the ribcage. This isn't a bad movement, however in the context of this exercise it is not what you are trying to do. Instead you are trying to open the front of the ribcage by bending the ribcage backwards. This of this as lifting the front ribs and also opening the spaces between the fronts of the ribs.)
Relax the back bend (and notice the release in tension at the back of your spine) and then repeat.
Bending the Thoracic Spine (and Lumbar Spine) Forwards
In the next exercise of yoga to improve posture the focus is on bending forwards.
Focus on tilting your pelvis backwards (pull up on the pubic bone) while bending your lumbar spine and thoracic spine forwards.
So that you use the sides of your waist (the obliques) focus on pulling the two bony points at the front of each hip crest up and back (towards the bottom of the back of your ribcage.)
Try to "bulge" the upper back or back of the ribcage at the same time. You can also imagine "sliding" the each pair of upper ribs forwards, relative to the ribs directly below.
Relax and repeat.
Isolating the Ribcage and Thoracic Spine
The next yoga to improve posture exercise isolates the ribcage and thoracic spine.
Instead of bending the lumbar spine and thoracic spine together the focus is on just bending the thoracic spine and ribcage.
Try to keep the pelvis still for this exercise. It may move slightly, the lumbar spine also. However make your main focus that of bending the thoracic spine and ribcage forwards and/or backwards as required.
Backbending and Forward Bending the Thoracic Spine
Focus on feeling your thoracic spine and ribs.
From the bottom upwards bend your thoracic spine backwards. At the same time feel the fronts of your ribs lifting and spreading apart. Then do the opposite and slowly bend your thoracic spine forwards.
Relax and then repeat all three actions (bend back, bend forwards, relax).
Ribcage Awareness
This next yoga to improve posture exercise is designed to help you feel the front, sides and back of the ribcage.
Lifting your front ribs
Lengthen your neck and bend your thoracic spine backwards. Focus on feeling the fronts of your ribs lifting.
Then relax.
Lifting your side ribs
As you repeat the exercise, expand your awareness to the include the sides of your ribcage. Feel the fronts and sides of your ribcage lifting and lowering.
The intent now is not to bend the thoracic spine backwards, but rather to feel the side ribs lifting and lowering.
Lifting your back ribs
Then after a few repetitions (once you have a feel for it) expand your awareness so that you also can feel the backs of your ribs lifting.
You may have to bend your thoracic spine forwards so that you can lift your back ribs.
Then see if you can feel the front, sides and backs of your ribs lifting and lowering.
Adjusting ribcage posture for easier rib lifting
If you can't feel the side or back ribs then deliberately adjust the shape of your spine and/or ribcage. See if you can find a position where you can feel your side and back ribs and move them.
When shifting your awareness from the front ribs to the side ribs to the back ribs, slowly shift your awareness. Make it a gradual shift so that your awareness expands so that you can feel your side ribs and front ribs both at the same time.
Then focus on just feeling your side ribs. Then when trying to feel your back ribs expand your awareness so that you feel the side and back of your ribs together.
Then focus your awareness just on the backs of your ribs.
Basic spine lengthening
Now for a basic spine lengthening posture improving exercise that can be done while sitting, standing or even laying down. (It can also be done while upside down but you may find it then helps if you change your reference points.)
Sitting
Try this first while sitting. (Cross legged, kneeling or in a chair.) Keep your pelvis on the floor or on your heels or on your chair.
Lift your ribs away from your pelvis and away from each other. This lengthens the waist and also creates space between the ribs.
Then pull your head up and back so that your ear holes move away from your ribcage. This lengthens the neck.
Then relax. When relaxing, move into a slouch. Let your ribcage sink down and let your head move forwards and down.
Then slowly lengthen again.
The Slouch, an important position for posture practice
This isn't necessarily a mistake but a lot of students don't fully relax during the relaxation stage. To relax, slouch or slump (gradually.) Let your head move forwards and your chest sink down.
Relaxing fully (slouching) and then lengthening fully both you a bigger movement and more opportunity to feel the difference between a long spine and a relaxed one.
It also takes the spine through a fuller range of motion.
Standing Spine lengthening
Generally when sitting the thighs more forwards relative to the pelvis, closing the front of the hip joints and opening the back. This tends to make our pelvis roll back when we sit so that the lower back rounds.
When standing the legs move down relative to the pelvis. Compared to while sitting the front of the hip joints are more open and the backs of the hip joints a little bit closed. This tends to cause the pelvis to roll forwards more (at least compared to while sitting) so that while standing our lumbar spine may tend to curve backwards.
And so to lengthen the lumbar spine while standing the focus can be on tilting the pelvis back slightly to "flatten" (but not completely) the lumbar spine.
If you already have a flat lumbar spine then this posture practice exercise perhaps isn't for you.
Note that the goal isn't to completely flatten the lumbar spine but to make the lumbar spine feel long.
Focusing on the pelvis and lower back
For this posture exercise, stand with the feet parallel and hip width apart with knees slightly bent. Bent knees can make it easier to roll the pelvis forwards and backwards.
Slowly push down on your tailbone. At the same time use your abs to pull up on your pubic bone.
Then slowly release.
While rolling your pelvis back focus on feeling your lumbar spine.
Focus on feeling the spinous process of the lumbar vertebrae moving away from each other. Then pay attention to your low back on either side of the lumbar spine. As you roll your pelvis backwards see if you can feel a point where you low back feels open and/or relaxed. You might feel it as a feeling of expansiveness or opening.
For a slight change in sensation and action, focus on pulling back and up on your ASICs so that your obliques are what cause your pelvis to roll back.
Head, ribcage then pelvis (and lower back)
Now lets start with pulling the head back and up.
Slowly pull the head back and up while lifting your chest. Remember to pull your chin down and in. As you lift your chest, pull up on your pubic bone (or pull up and back on your ASICs).
When the back of your head moves up notice your tail bone reaching down. The spine lengthens between these two end points.
Once you have a general feel for this posture practice try to add some lift to the back and sides of your ribcage.
Knees bent, then gradually straightening them
I'd suggest continuing to practice with knees bent because it can make it easier to postion your pelvis. And it can make it easier to adjust your ribcage posture. However, as you get more used to the exercise, you can work towards practicing with knees straight. One way to work towards this is to start with knees bent, adjust head, ribcage and pelvis, then keep those adjustments while slowly straightening your knees. Then reverse the process. As you get used to this exercise, you can try working on head, ribcage and pelvic positioning with knees straight.
Adjusting
All of these exercises are a starting point for improving posture. The idea isn't to do these exercises robotically. It's to help you to learn to feel and control your body. From there, you can work on adjusting so that you can hold good posture with minimal effort. As an example, with your head, you can adjust it slightly forward or back to find a position where it is balanced on your neck but with minimal effort.
If focusing on your ribcage, you can adjust the amount of front rib lift so that your shoulders sit comfortably on your ribcage (and so that your head is balanced over your neck.)
As you get more used to "better posture", you might then choose to use it while doing different things. And then you can make adjustments depending on what you are doing. To that end, the more you focus on feeling and controlling how the parts of your body relate (via muscle sensation and connective tissue tension), the easier (and the more enjoyable) this process can be.
Learning to learn
For an overview of the process of learning and how you can apply it to anything, not just to learning your body (or improving your posture), and in a way that makes learning more effective and more enjoyable, please check out Mental models, learning how to learn.
Published: 2013 07 24
Updated: 2023 03 31
