Related:
Fixing Forward Head Posture
Upper Back Exercises (Fix Upper Back Posture)
Winged Scapula (and How to Unwing them)
The following yoga posture improvement exercises are done in an upright position, either sitting or standing.
That means you can practice them anywhere whenever you have a few minutes to spare. Whether you are waiting for someone or just taking a quick break while still in front of your computer.
You can also practice moving between slouch and zero-slouch (or is it slouch-zero?) while waiting for your favorite beverage to arrive.
Feel and Control
So that you can feel your body and control it, work at doing these fix-your-posture exercises slowly and smoothly.
To that end, first, get the basic idea of each exercise.
Once you understand what you are trying to do, then practice doing all movements slowly and smoothly.
As an example, take 5 seconds to lengthen your neck, then 5 seconds to relax it.
For even better control and sensitivity work at making each movement repetition last up to 10 seconds. That's just a guideline to get you started.
The most important quality is smoothness. The idea of moving slowly is to make it easier to develop smoothness and also to help you feel your body and control it.
Use Breath-Like Rhythmic Movements
In yoga, the term "vinyasa" usually means breath linked movement, or movement with intent. The intent is that of synchronizing movement and breath. The result can be a more mindful posture practice since you have to focus on feeling your breath in order to synchronize with it.
In these posture exercises, the focus is not on breathing but on "Breath Like" movements.
Rather than trying to breath slowly and then synching movement with that slow breath, the focus is on slow and controlled movements that are breath-like in nature.
Breath like movements are repetitive (and better yet, rhythmic) and basically consist of a lengthening movement (like an inhale) and a relaxation movement (like an exhale.)
Try to emulate a deep slow breath in your posture practice exercises. Make both the lengthening movements and the relaxation movements slow and smooth.
Some Breathing Exercises to Help Fix Your Posture
For some breathing exercises that help you practice good posture, try this easy breathing technique.
It involves moving your spine as you breathe while sitting or standing upright.
Breathing Anatomy for Yoga Teachers also includes some simple breathing exercises that can be used to help fix your posture.
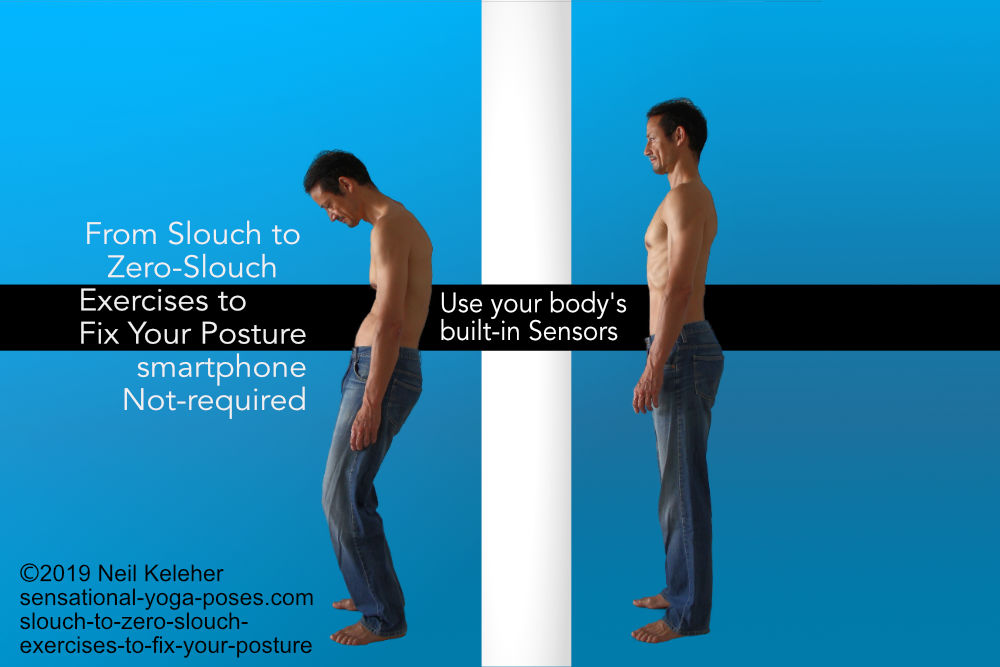
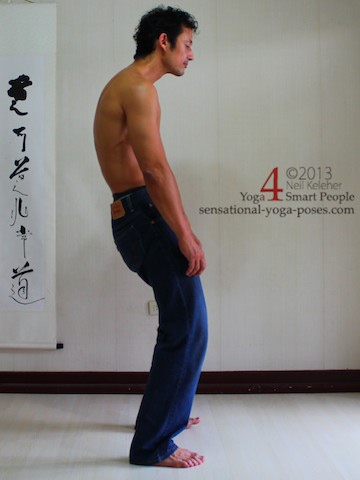
A starting position for improving posture is the slouch.
This is normally thought of as bad but we'll think of it as one of many possibilities for the spine. It is one position in which the muscles of the spine are fully relaxed. (Or as relaxed as possible.)
The muscles at the back of your spine are also being stretched!
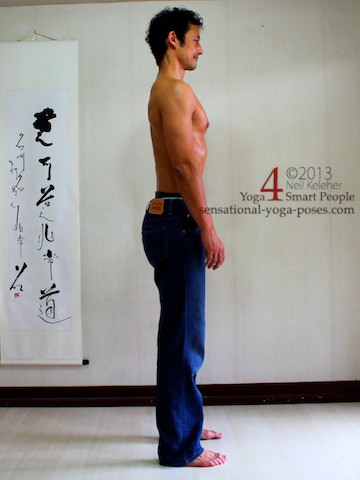
An ending position is zero-slouch or "slouch-zero."
1. Slouch,
2. Zero-slouch or Slouch-zero (as in: He (or she) ain't no slouch potato)
Both positions involve continuous concentration.
- In the slouch the intent is to relax and sink down, to let the weight of our bones be pulled down by gravity.
- In the zero-slouch position the intent is make the back of your spine feel long.
When making your spine feel long, it doesn't necessarily have to be straight. The important thing is that you are activating muscles to create the sensation of length.
Those same muscles will also generate sensation that helps you to feel your spine (as well as your head, pelvis and ribcage).
Continually Lengthen, Continually Relax
When practicing both positions, rather than just stopping in each position, instead focus on feeling your way deeper into each position.
Even if you think you are at your limit, imagine that you can go further and so continue to look for space to either sink down further or lengthen upwards further.
- While lengthening, see how much further you can lengthen upwards.
- While relaxing, see if you can relax further, see if you can sink deeper.
Both actions require a constant scanning awareness of the body, looking for places where you can still release or still continue to lengthen.
The idea of practicing these "extreme positions" is so you can learn to feel them and recognize them.
With practice it then becomes easier to find a spinal posture that is both long and relaxed at the same time, one that uses minimum effort to stay upright.
This is the comfortably balanced middle ground between fully lengthened and fully relaxed.
One of the easiest ways to practice both the slouch and zero-slouch is to first break the body down into elements and practice repeatedly lengthening and then relaxing those elements.
This is so that you can learn both to feel those parts and also to control them.
In both slouch and zero-slouch you get proprioceptive feedback. The idea is to use this to feel your body so that you can, at any time, fix your posture by feel.
Once you have a feel for the individual parts in isolation, it's then easier to practice sequencing the actions as an integrated whole.
At any point where you can't feel a part of your spine, you can always go back to the isolation exercises and focus on just that part. Or create special isolation exercises to focus on any part of your spine (or associated bones) that you can't feel.
The neck controls the relationship between the head and the ribcage. If you only had time to focus on one aspect of posture practice, I'd suggest that focusing on fixing neck posture would give the best dividend.
The normal tendency, (at least for myself) is for the head to move forward, mainly because of reading or working in front of computers. But also because of poor body awareness, a lot of us may not even be aware that our head is forward of our ribcage.
This first exercise is to practice stacking your head over your ribcage. This means allowing your chest to lift so that you can easily keep your head in this position when you choose.
Lengthening the Back of the Neck
If you are slouched in front of a computer while reading this, notice where your head is in relation to your ribcage. Also notice the position of your chest.
Is your head reaching forwards, ahead of your ribcage? Is your upper body slouching?
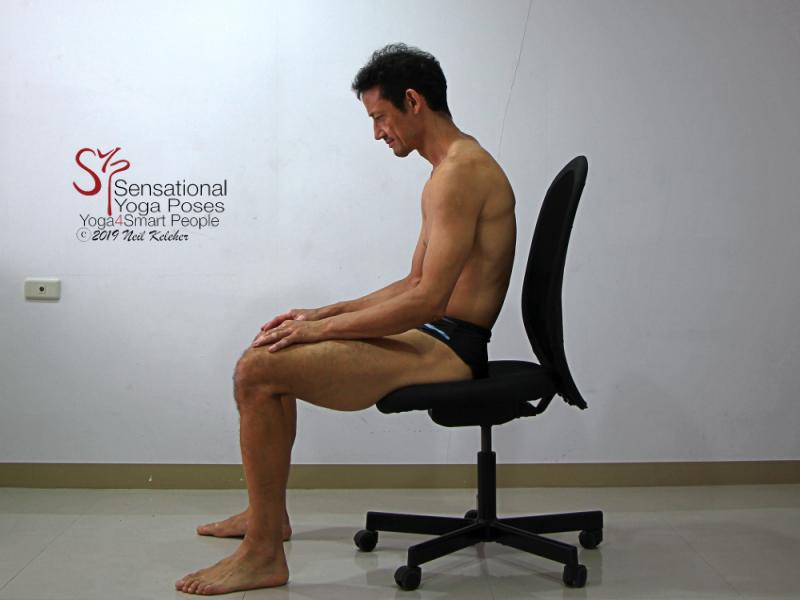
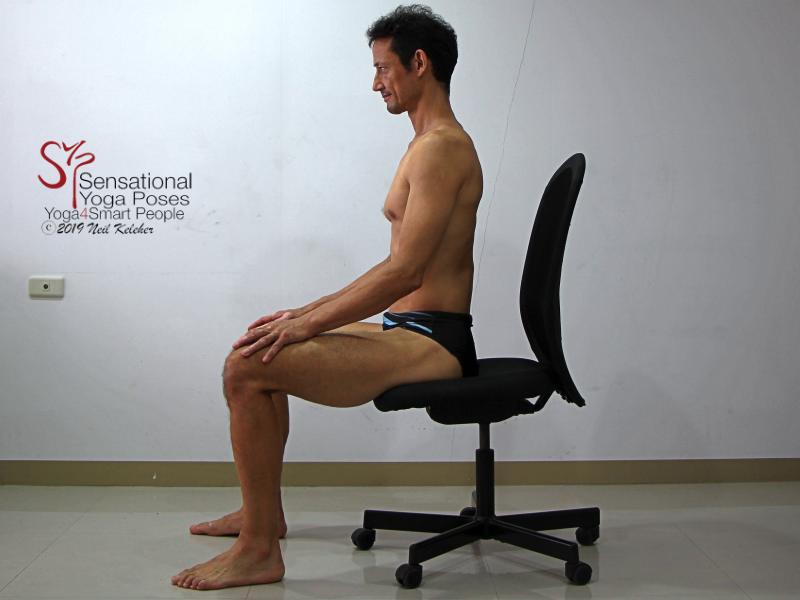
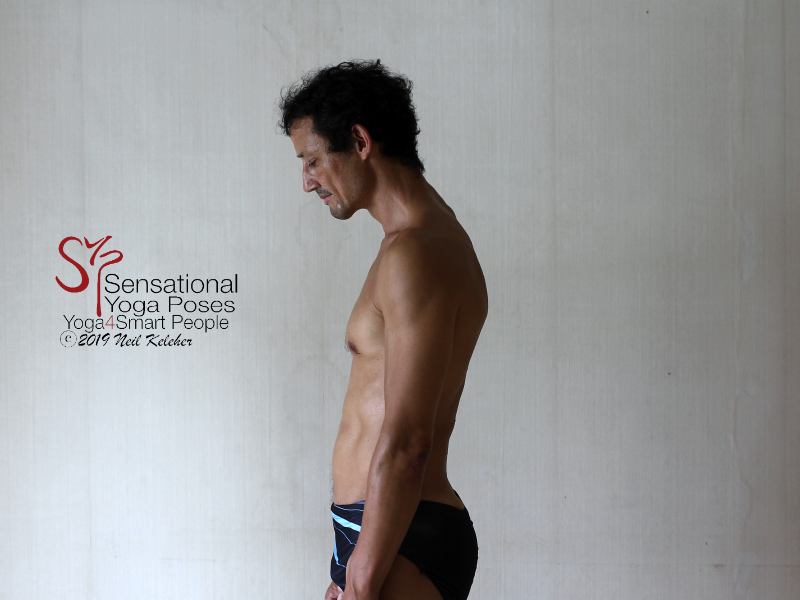
I'm sure you don't normally wear a bathing suit to work! In any case, notice the backward tilt of my pelvis. Also notice how my head is ahead of my ribcage.
While it's harder to see that my chest is sunk, you can infer it from the forward bend in my upper back.
This exercise can be done while standing or while sitting in a chair!
Start with your head forwards and down.
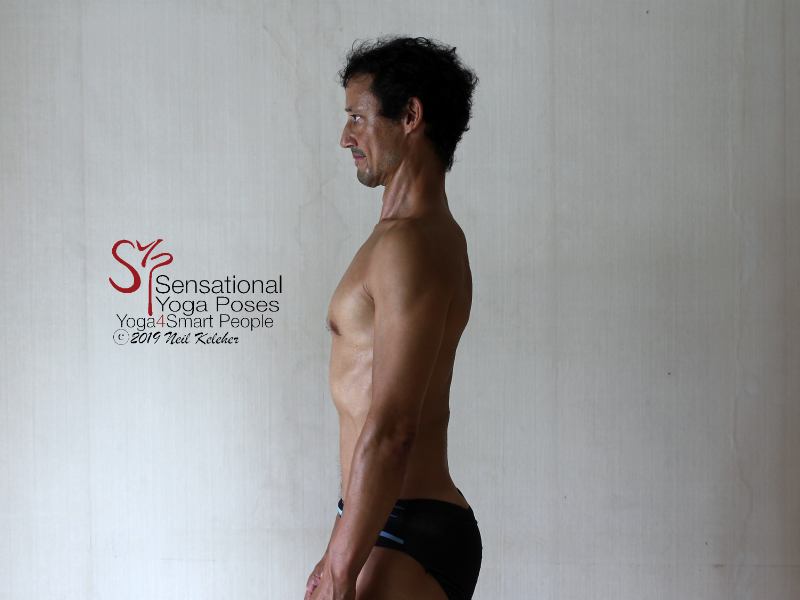
- Pull your head back, relative to your ribcage.
Allow your chest to lift as you do so.
- Next, lower your chin so that the back of your neck feels long.
Pause and adjust.
- Relax and let your head move forwards and down and allow your chest to sink
(Remember the slouch!)
The focus in the lengthening phase of this exercise is on pulling your head back and up and on then making the back of your neck feel long.
While the focus is on your neck in this exercise, you should allow your chest to lift so that your head can easily move rearwards and so that your neck can lengthen.
In these two photos its easier to see how my chest has lifted as a result of pulling my head back and up.
The Problem With Imaginary Strings
One common instruction for this exercise is: "to imagine a string pulling you up by your crown"".
The problem with that instruction is that it doesn't focus awareness inside of your body.
Here the focus in both phases is noticing the change in relationship between your head and your ribcage. It's also in noticing the back of your neck, making it feel long, or if you like "open" as you drop your chin.
Imaginary Walls, or Real Walls, are Better
If you do have trouble with this action, imagine sitting with your back against a wall. Each time you bring your head back and up, imagine trying to touch the back of your head to the wall.
Better yet, so that you get the chin tuck for free, imagine trying to touch the base of your skull to the wall.
Rather than trying to hammer your head into the wall, move your head slowly and smoothly. Feel your head, and your neck as you lengthen it. When relaxing your chest, notice the sensations in your chest and the back of your neck (and even your shoulders) as you chest sinks down and your head moves forwards.
We'll skip the thoracic spine for a moment and now focus on the Lumbar. (The thoracic spine is the part of the spine that the ribs attach to!)
An easy tendency while sitting is for your sacrum to sink so that your pelvis rolls back. This, in combination with a sinking chest then causes the back of your lumbar spine to flatten or even round forwards.
The opposite problem can occur while standing. Here the tendency may be for your sacrum to lift so that your pelvis tilts forwards. This then causes an accentuated lumbar back bend. However, if your head is forwards and your chest sunk down, then you may find that instead of rolling forwards, your pelvis rolls back.
Because of this, I'd recommend practicing the standing and seated versions of the following exercise.
Posture Practice Movement Terms for the Pelvis and Spine
In my classes I try to be consistant in terms of moving the pelvis and bending the spine.
- Rolling the pelvis forwards results in the pubic bone moving down and the tail bone/sacrum moving up.
- Rolling the pelvis backwards results in the pubic bone moving up and the tailbone moving down.
When bending the spine:
- A forward bend is where the spine bends around something imaginary that is in front of the spine.
- A backward bend is where the spine bends around something behind it.
- A bend to the right means the spine is bending around something to the right of the body.
Lifting Your Sacrum for a Lumbar Backbend
The first posture exercise for the lumbar spine is to get you used to feeling the pelvis and lumbar spine while bending the lumbar spine backwards.
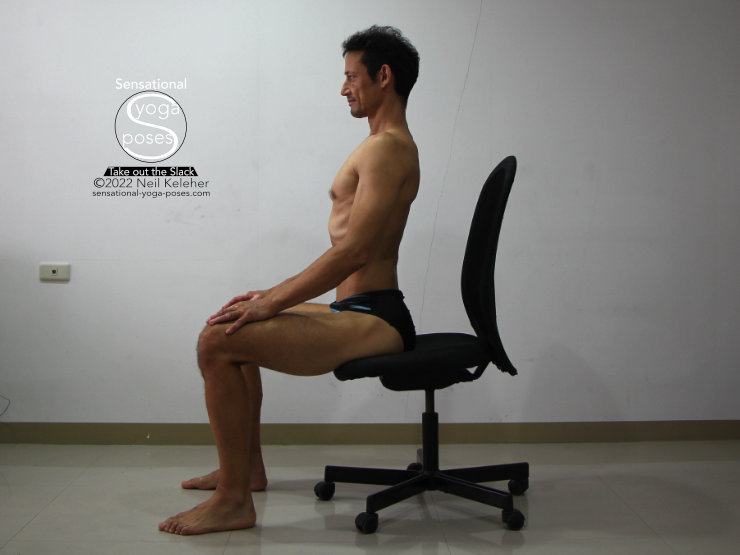
If you are doing this exercise while sitting, sit near the front of your chair away from the chair's back-rest.
If doing this exercise while standing, stand with your knees bent so that it is easier to roll your pelvis forwards or backwards.
For this exercise, and the one that follows, the starting position for the pelvis is "neutral".
This is somewhere between fully tilted forwards and fully tilted rearwards.
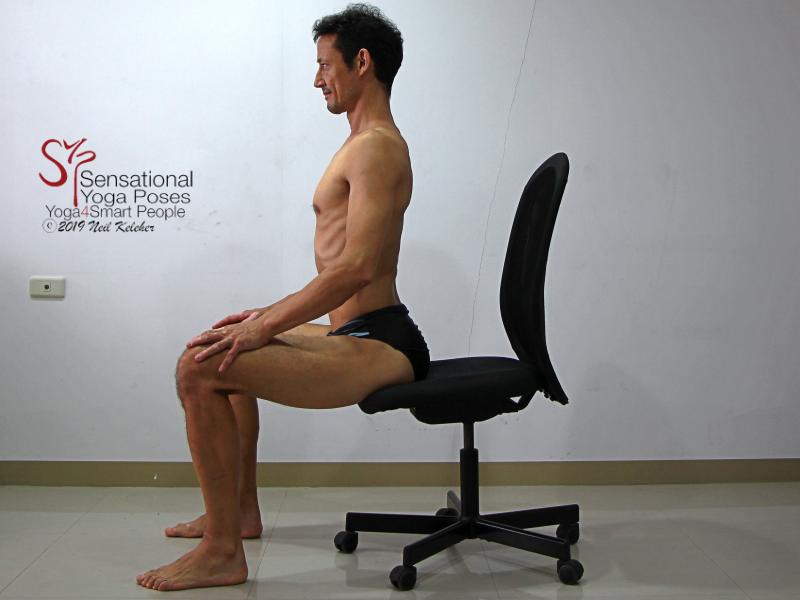
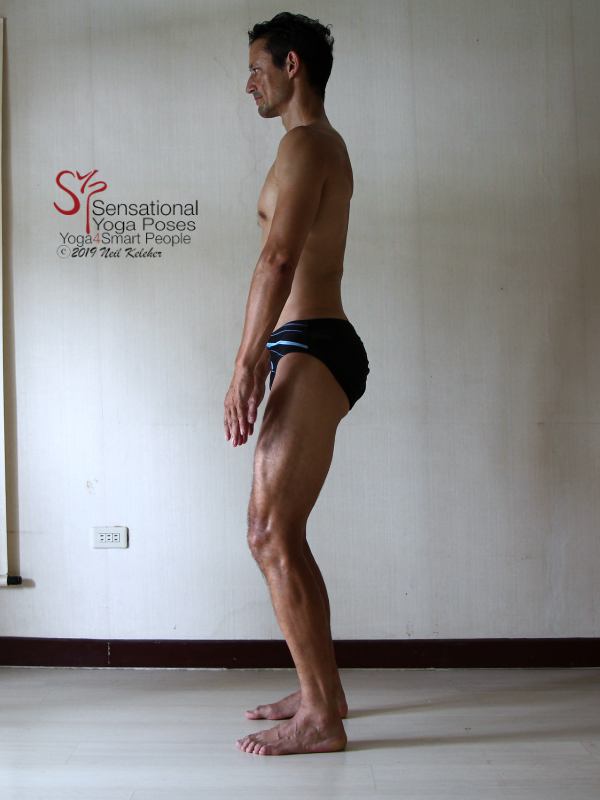
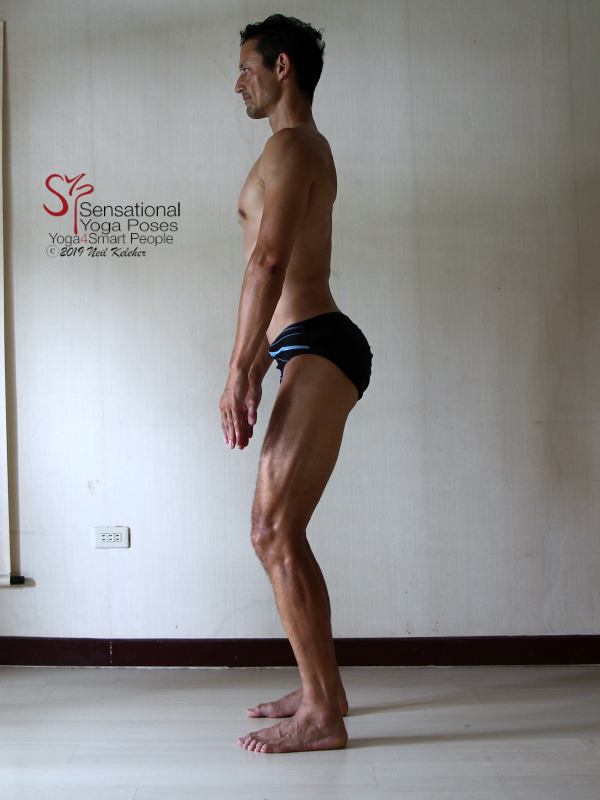
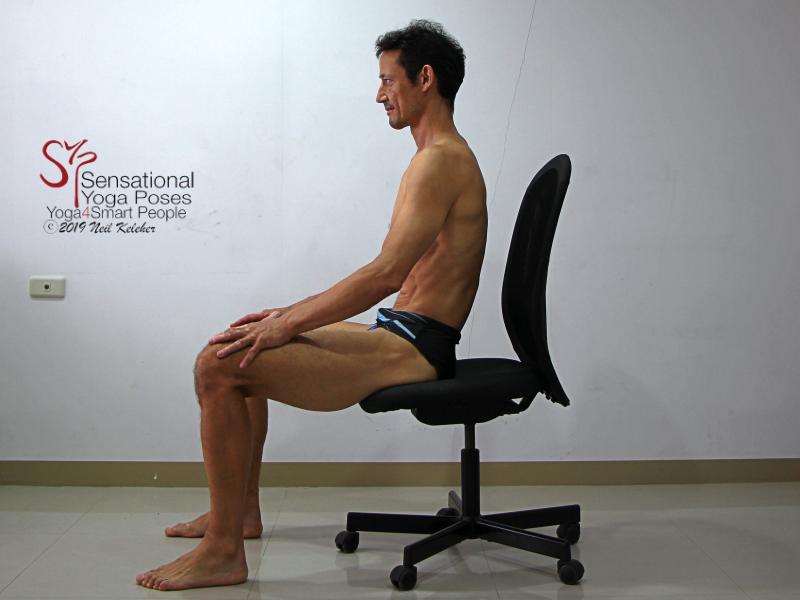
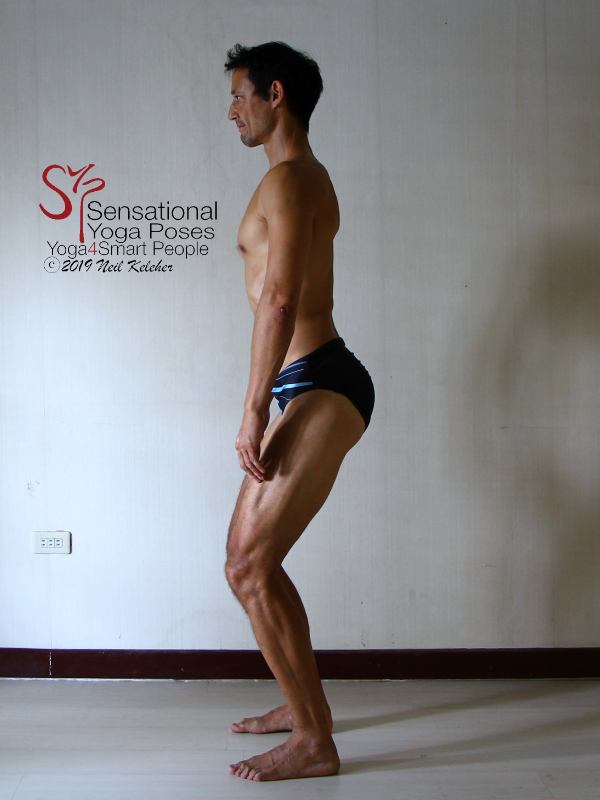
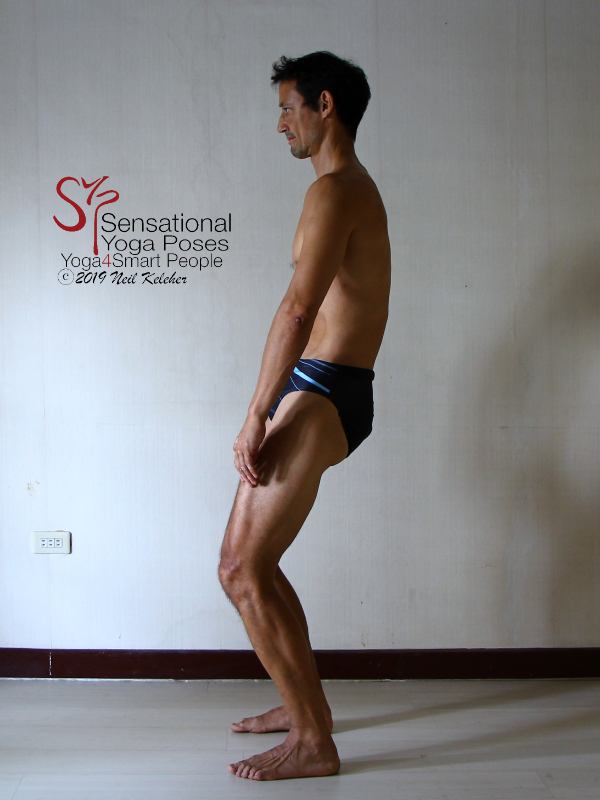
Note the increase in curvature of my lower back in the second picture as a result of lifting my sacrum so that my pelvis tilts forwards.
In the second picture, my chest has lifted slightly.
- Lift your sacrum up so that your pelvis tilts forwards and your lumbar spine bends backwards.
- Feel your spinal erectors activate at the back of your lumbar spine.
- Return to the start and feel your spinal erectors relax.
Each time you lift your sacrum focus on feeling your spinal erectors activating at the back of your lumbar spine.
You can also try to carry the sensation downwards, to the back of your sacrum.
To accentuate the activation of your spinal erectors (or to get them to activate so that you can feel them) try lifting your sacrum higher.
When lifting the sacrum while standing, if your are standing with knees bent, keep the knee bend constant both as you lift your sacrum and when you return to the initial position.
Allowing Your Ribcage to Slide Forwards
As you roll your pelvis forwards during this exercise, you may find that your ribcage "slides" forwards slightly relative to your pelvis. That is fine and natural.
This roughly corresponds to your chest lifting as your head moves back in the previous exercise.
Now however, your chest moves forwards as your pelvis rolls forwards.
Dropping Your Sacrum for a Lumbar Forward Bend
For this exercise, again start with your pelvis in a neutral position. The exercise is to cause your lumbar spine to flatten by dropping your sacrum.
- Slowly move your sacrum downwards so that your pelvis rolls rewards and your pubic bone moves upwards.
- Allow your ribcage to move back at the same time!
- Slowly relax and return to your starting position.
Notice the change in sensation in your lumbar spine when you drop your sacrum.
Look for a feeling of openness or length at the back of your lumbar spine as do so.
When returning to the start position, again notice the change in sensation.
Here it's easy to see how my ribcage moves rearwards when the sacrum is dropped.
You can also see in the second picture that my abs are engaged, helping to keep my ribcage upright.
When you do this exercise while sitting, you may find it easier to notice how your ribcage moves rearwards relative to you pelvis as you drop your sacrum.
See if you can notice the same thing when you do this exercise while standing. Allow your ribcage to move backwards and see if you can feel the weight of your upper body pressing down through the sacrum, causing it to sink.
In either case, take the time to notice the "open" sensation created at the back of your lumbar spine when you tilt your pelvis backwards.
In the first picture my sacrum is lifted. Also notice how far forwards my ribcage is! This ideally makes it easier to see how my ribcage has moved rearwards in the second picture with my sacrum dropped.
If I dropped my chest and allowed my head to move forwards and down in the second picture, I'd be in a standing slouch
Using the exercises for the lumbar spine as a starting point, hopefully you'll have an easier time learning to feel your thoracic spine, particularly when bending it backwards.
The upper half of the ribcage, because it attaches to the sternum, tends to be stiffer and less mobile. The sternum gives the upper ribcage more stability so that it in turn can create a stable foundation for the shoulder blades.
Note that the reason that we have a ribcage (and a sternum) isn't necessarily for protection.
A team of research biologists have found that early turtles developed shells to enable them to dig with greater ease.
(This is also mentioned in the series "The Boys")
And so our ribcage may be have been designed in part to enable us to use our arms with greater strength.
Bending the Thoracic Spine (and Lumbar Spine) Backwards
The starting position for this exercise is with a neutral pelvis and a neutral ribcage. However, if you aren't sure where that is, you can figure it out after doing this exercise a few times. A neutral ribcage is somewhere between fully lifted and fully sunk down.
- Start by lifting your sacrum so that your lumbar spine bends backwards.
- Feel your lumbar spinal erectors activating.
Additionally, you can focus on feeling tension at the back of your sacrum (your lumbar and sacral multifidii)
- Carry the sensation up into the back of your ribcage so that your thoracic spinal erectors also activate.
- Use your spinal erectors to bend your thoracic spine backwards so that your chest lifts.
- Relax and repeat.
When activating your spinal erectors, rather than trying to activate them all at once, start at the bottom and work your way up your spine.
In the start position my head and ribcage are relatively stacked. Notice how straight my spine is.
In the second picture you can see my lumbar and thoracic spine are bending backwards and as a result my chest is lifting.
You could also start in a slouch.
Once you get a feel for your thoracic spinal erectors, focus on feeling the front of your ribcage lifting and expanding.
You can accentuate sensation in your ribcage by deliberately working at lifting and expanding the fronts of your ribs.
To make bending the spine backwards easier you may find it helps to lift the back ribs as you bend backwards.
Avoid Squeezing Your Shoulder Blades Together
As you bend your upper thoracic spine backwards, avoid squeezing your shoulder blades together.
Squeezing the shoulder blades together (retraction) to make the chest more open isn't a bad movement, however in the context of this exercise it is not what you are trying to do. Instead you are trying to open the front of the ribcage by using your spinal erectors and intercostal muscles (the muscles that are located between adjacent ribs).
Slouch: Sink Your Chest to Bend Forwards
Next, the focus is on sinking your ribcage.
- Start by dropping your sacrum so that your pelvis tilts backwards.
Your pubic bone will lift.
- From there, drop your chest. Allow your head to move forwards and down as you do so.
- Return to the start position (sitting upright)
- Repeat.
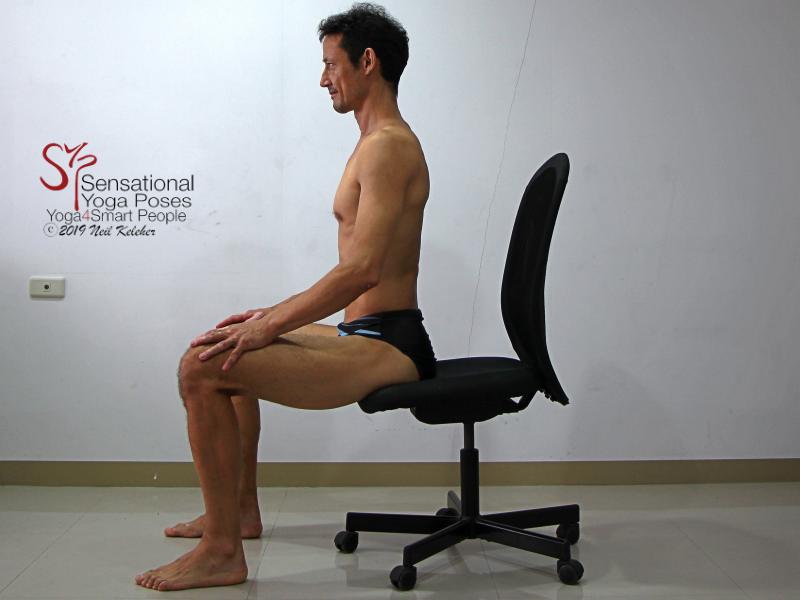
As I slouch you can see how my ribcage moves backwards relative to my pelvis. Note the backward tilt of my pelvis in the second picture. And note how my head is now forwards relative to my ribcage.
While you can focus on using your abs to pull your chest down (and tilt your pelvis backwards), so that you get used to the feeling of relaxation, focus on a relaxed slouch.
When dropping your chest, you may feel your ribcage moving rearwards relative to your pelvis. When returning to neutral, feel the your ribcage moving forwards.
Up to now, all of the exercises have been focused on helping you to get a feel for the different parts of your spine as well as your pelvis, head and ribcage and how they relate.
In the next exercise the focus is on stacking the elements of your spine.
Rather than giving your specific instructions, what follows is more of a framework for helping you to feel your posture and fix it.
Sitting
Try this first while sitting.
- Pull your head back and up and lengthen the back of your neck
- Allow your chest to lift
- Adjust the position of your head, forwards or backwards relative to your ribcage, so that your neck feels comfortably long.
- Move your ribcage forwards or backwards relative to your pelvis and find a position so that your lumbar spine feels comfortably long.
- Adjust the forward/backward tilt of your pelvis as you shift your ribcage so that your lumbar spine feels even more comfortable or "right"
- Relax by slowly slouching.
This may be too much to do all at once. So, break it down.
First practice lengthening your neck and adjusting your head position to find a comfortable posture.
Hold for a few moments to get used to holding a comfortable and balanced posture. Then relax. And repeat
When moving your head back or forwards you can also adjust the amount of "chest lift". Here again, find a position that is comfortable.
Next you can practice adjusting the amount of pelvic tilt while making your lumbar spine feel long. Here you can also adjust the position of your ribcage relative to your pelvis so that your lumbar spine feels comfortable as well as long. Hold for a few moments then relax.
Next you could also play with the amount of chest lift. The idea in doing so is to make your thoracic spine feel long. This can be easier if you learn to lift your back ribs.
Costal Breathing includes exercises for learning to lift and feel your back ribs!
Don't be afraid to play with how you sequence these actions. You can start at the bottom and work up. Or start at the top and work down. Eventually you'll find that you can make your spine feel comfortably long with relative ease.
The instructions for fixing your posture while standing are pretty much the same. I'd suggest standing with your knees bent to start with so that you can more easily adjust the tilt of your pelvis.
As you get better at fixing your posture while standing, practice doing it with your knees straight. Another option is to practice while balancing on one foot.
Here again, sequence the adjustments.
While standing you may find it makes more sense to adjust your pelvis first and then your head.
Additionally, you may find that for hip comfort something you can adjust is the position of your feet, in particular the amount of foot turnout.
In both cases, the idea of finding a comfortable position is that it shouldn't be tiring, making it easier to maintain.
What about Your Shoulders?
Another important aspect of fixing your posture is noticing your shoulders.
With a comfortably vertical ribcage your shoulders should be able to balance on top of your ribcage with your arms hanging comfortably down. If not, then you can practice fixing your shoulder posture with similiar exercises.
Published: 2013 07 24
