Yoga Pigeon Pose
Supporting the Front Hip In Yoga Pigeon Pose
Yoga pigeon pose has several variations all of which can be used to stretch the hip in different ways.
In most variations the front knee is bent with the shin resting on the floor.
The other leg reaches straight back.
Positioning the Front Knee in Yoga Pigeon Pose
One common problem beginners have in yoga pigeon pose is positioning the front knee.
When viewed from the front, the knee is positioned so that the knee is to the outside of the same-side hip.
Supporting the Front Leg Hip in Yoga Pigeon Pose
Another problem that beginners have in yoga pigeon pose is that they have difficulty supporting the front leg hip.
I use the following hip lifting exercise to teach them how to use their front leg hip.
Lifting and Lowering the Front Hip In Yoga Pigeon Pose
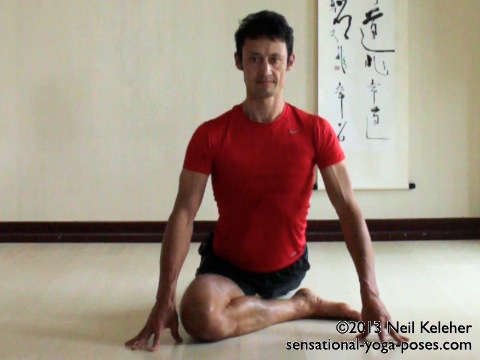
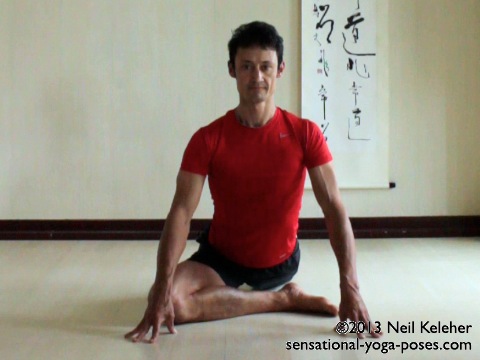
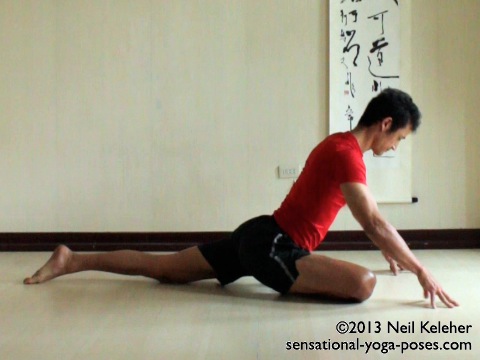
With the right knee forwards, hands on the floor in front of the body, and right hip on the floor, lean the body to the left far enough that the right hip comes off of the floor. Return to the start and then repeat a few times. (Shown above.)
Note the position of the front foot relative to the knee. For this exercise the front foot can be further back than the knee (close to the front of the hip.)
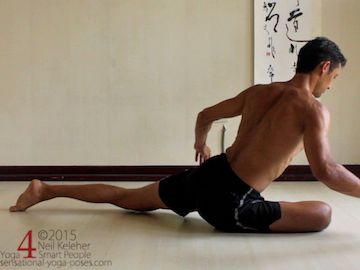
Then try to do this same action with the hands off of the floor. Now you have to use the muscles of the front leg to lift the pelvis. Lean your ribcage to the left and as you do so use your outer hip muscles to press the front knee down into the floor. Press down with enough pressure to lift your front leg hip. Then see if you can slowly lower the hip back down.
See if you can find the balance point. Lean your ribcage just far enough that you can easily use you leg to help lift your pelvis. Once you've lifted the pelvis try to make both sides of the pelvis level. Also, reach the rear leg backwards and point the back knee down. If using a mat make the back leg parallel to the long edge of your yoga mat.
Pushing the Pelvis Back and Down in Yoga Pigeon Pose
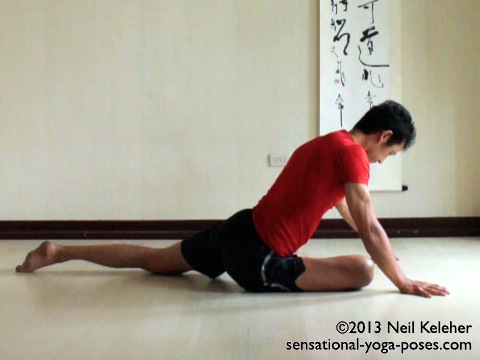
Once you can support the front leg hip, you can then focus on pushing your pelvis back and down, away from your front knee.
This is something that you can do in nearly all variations of yoga pigeon pose. (Double pigeon is an exception.)
To give your pelvis room to sink back and down first focus on reaching your back leg rearwards. Push your rear most foot back.
With your hands on the floor in front of your pelvis (position them so that you can push your hands forwards against the floor) you can use your arms to help create a backwards push on your ribcage and pelvis.
The feeling is similiar to pushing the ribcage rewards, away from the hands, in downward facing dog.
Expanding Your Ribcage and Lengthening Your Waist in Yoga Pigeon Pose
Prior to pushing back, it may help to lift and expand your ribcage. As you do so, make your waist feel long.
When pushing your ribcage back, keep your ribcage lifted and expanded, and your waist long. This is whether or not you are upright or bent forwards in yoga pigeon pose.
You may find that it's easier to lift and open the front of your chest if you pull your head back and up with your chin down so that the back of your neck feels long.
Adding Shoulder Flexibility Stretches to
Upright Yoga Pigeon Pose
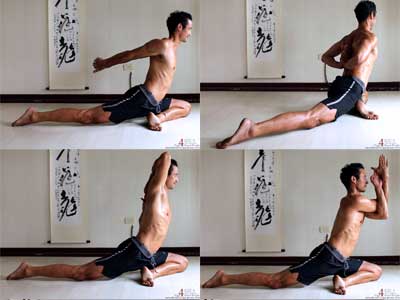
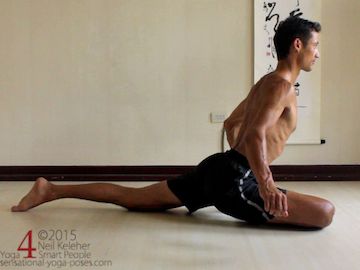
Once you are able to maintain a stable foundation in upright pigeon pose you can experiment with taking the hands off of the floor and keeping them lifted. You can then add any of the following shoulder flexibility stretches.
Published: 2012 02 03
Updated: 2021 03 10
