If you have difficuly kneeling with your butt on your heels you can leave the next pose out... or work on improving the range of motion of your knees.
So that you can work towards getting your butt to your heels, lean forwards while leaning. Then slowly sit upright. As you sit upright notice the weight increase will help your hips to sink down. So only sit upright as far as is comfortable. Then learn forwards again to take the weight off of the stretch. Repeat a few times and work at gradually deepening the stretch.
Note that this technique can also be used to stretch ankles which are tight at the front.
For the ankles in paricular, when sitting upright press the toes down into the floor.
From this toes forward kneeling position you can simply lean back to lift your knees. Then stand up.
The first two beginners yoga poses can be used to stretch the top and bottom of the toes.
Start in a kneeling position. Reach your hands behind you. Bend your elbows and slowly lift your knees. Then slowly lower your knees. Repeat a few times and focus on moving slowly and smoothly.
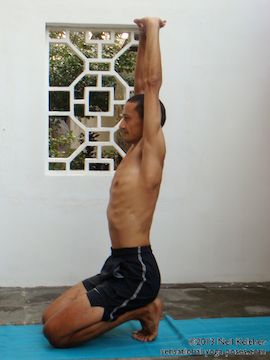
Next kneel with your knees slightly separated and your toes tucked under. Slowly press your toes into the floor, the slowly relax. Once comfortable with that add your arms. Interlace your fingers and move your arms forwards and up, pressing your arms to the ceiling. As you relax your toes, lower your arms to the front, switch the interlock of your fingers and then repeat. Slowly press your toes into the floor while at the same time slowly lifting your arms, then slowly relax both.
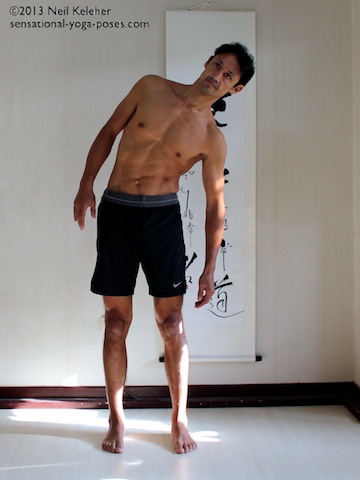
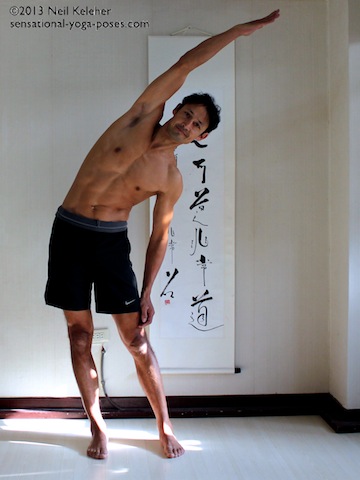
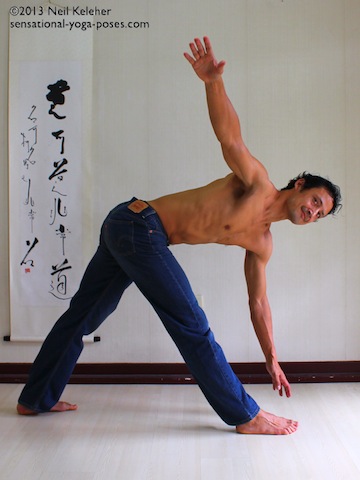
The standing side bend is a relatively simple stretch for the side of the body, at least in concept.
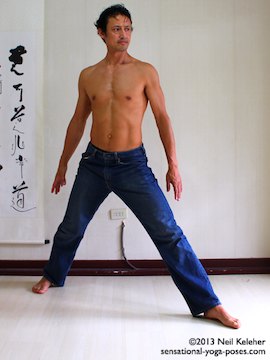
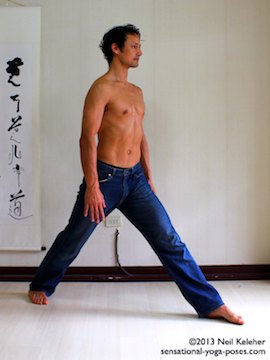
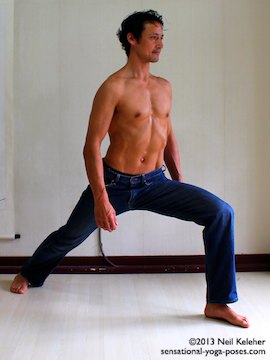
Standing with feet apart push your hips to the right. Reach your ribs and upper arm to the left, away from your pelvis.
Slowly push your pelvis to the right to deepen the stretch then slowly relax. Repeat a few times and then add your arms. Reach your top arm over your head.
As you push your pelvis to the right, lengthen your arms and spine to the right.
Then relax and repeat.
You can also reach with your bottom arm.
Repeat on the other side.
Single leg standing poses are great for beginners because they are easy to understand and don't require a lot of flexibility. They can be used to develop coordination and control. They can also be used to develop focus. The following standing on one leg beginners yoga poses includes a mix of moving while in the pose (vinyasa) and simply standing still (or trying to.)
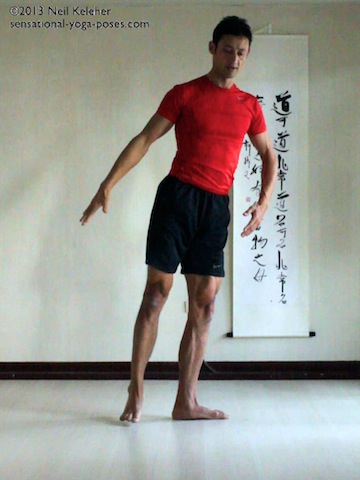
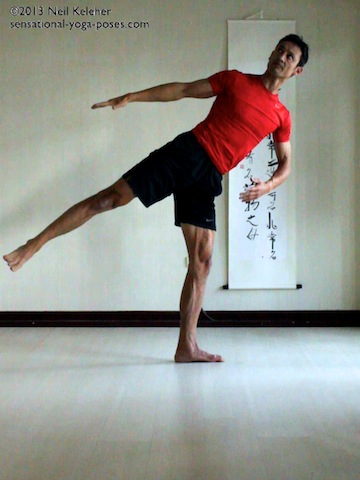
As a preparation for half moon yoga pose, stand with right foot turned out 90 degrees and both knees bent.
- Move body to the right so all of your weight is on your right leg.
- Lift your left leg.
- Keep your weight on your right leg touch your left foot to the floor.
- Move your body back to the left so weight is even on both legs.
Repeat a few times moving slowly and smoothly at all times.
Repeat on the other side.
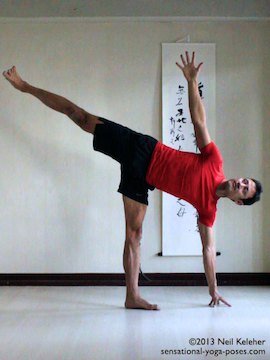
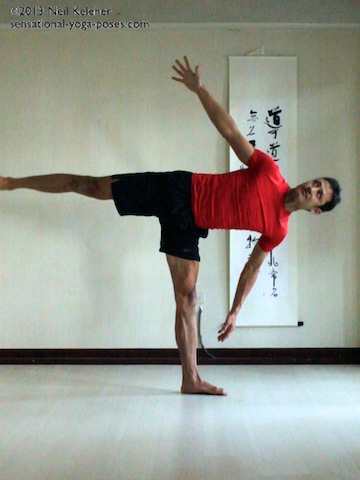
The next beginners yoga workout exercise builds up on the previous exercise. It starts with a vinyasa, moving in and out of half moon yoga pose a few times and then you hold the pose for a few breaths.
With right foot turned out, shift weight on to right foot and lift left leg high. Try to touch right hand to the floor. (Bend your right knee if you need to, or use a yoga block.)
- Shift your weight to the right so that some of your body weight presses through your arm.
- Shift your weight back onto your right leg and then lift your right arm.
- Put your hand down and then repeat.
After a few repetitions, hold the pose with your hand on the floor with some of your weight pressing through the arm.
Shift your weight back to your leg to stand and then repeat on the other side.
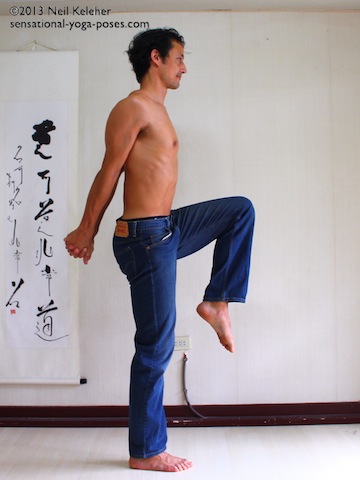
Rather than moving within this next beginners yoga pose simply hold it.
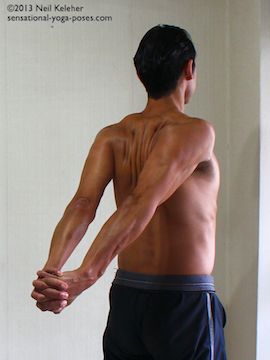
Start with feet parallel. Shift weight onto right foot, lift left knee forwards and up. Claps hands behind back.
- Move shoulders back,
- lift chest,
- straighten arms,
- then try to pull upper arms away from each other.
When you do the other side, switch interlock of hands
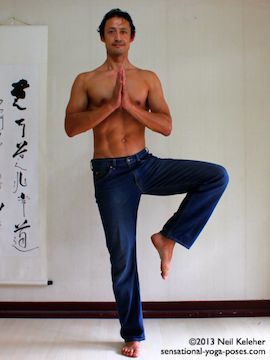
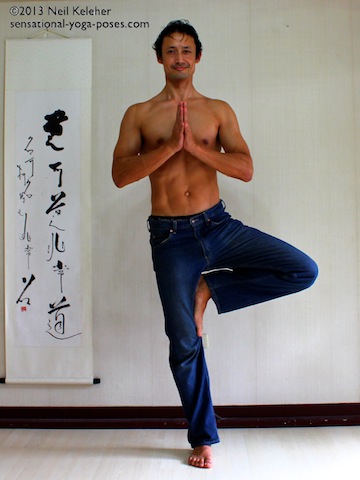
Some people can't reach position their foot high up on the opposite thigh in tree pose. Others have a problem with being able to reach one foot higher than the other, or they have trouble with he foot slipping on the thigh. Also in tree yoga pose, balance is difficult when you press the foot into the other leg. This tree pose variation avoids all of those problems.
Stand with feet parallel. Shift your weight on to your right foot. Rotate the left leg so that the knee points out and then bend the left knee and lift it, keeping the foot a few inches away from the inner thigh of the right leg.
Hold for a few breaths and then repeat on the other side.
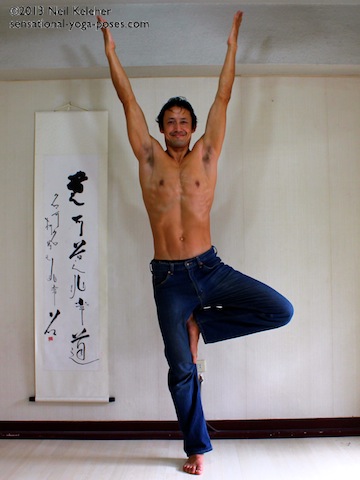
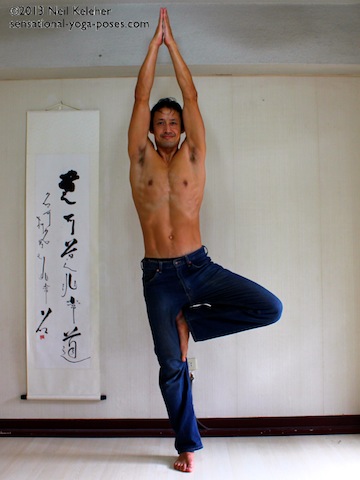
A tree's branches reach upwards and outwards as it grows. In this version of tree yoga pose your arms can reach upwards and then inwards.
Start with feet parallel and then shift your weight to your right foot. Rotate the left leg so that the knee points out. Bend the knee and place the foot against the inside of your right leg. You can position the foot on your right shin, across the knee, or above the knee as close to the groin as possible. Use your left leg to press your foot against your inner thigh. Slowly increase the pressure. At the same time "resist" with your inner right thigh. Try to press your inner thigh with the heal of the foot and the forefoot.
If you foot keeps slipping then hold on to it with your left hand (assuming it is high enough on your thigh.) Otherwise, start with your hands together in prayer in front of your chest. Then after a few breaths reach your arms up, reaching your ribs and shoulders up at the same time. Then slowly bring your palms together over your head while keeping your elbows straight.
Slowly release and repeat on the other side.
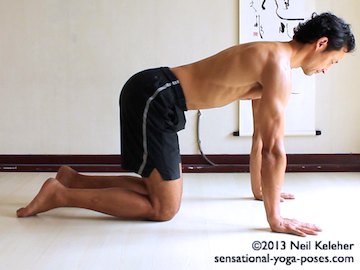
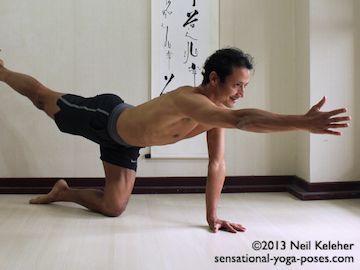
In this version of balancing cat yoga pose you lift the arm and leg on the same side of the body. I'm using this pose here to give your feet a rest and also as a preparation for the next pose, warrior 3.
On all fours with knees under hips and wrists under shoulders,
- shift pelvis to right and reach left leg back.
- Point left knee down, make left leg feel long.
- Use shoulders to lift chest.
- Shift ribcage right and reach left arm forwards.
Focus on making your leg, spine and arm feel long while inhaling. Relax the length while exhaling. Hold and then return to tall fours and repeat on the other side.
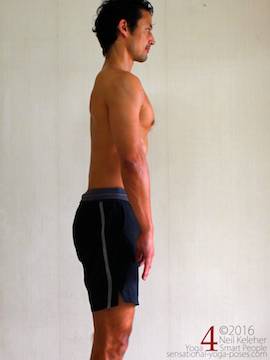
Start with feet parallel. Shift weight to your right foot but keep your left foot on the floor. (The left heel can lift). Notice the difference in sensation between your right leg and your left.
Repeat on the other side.
Repeat on both legs a few times, holding for a few seconds at a time.
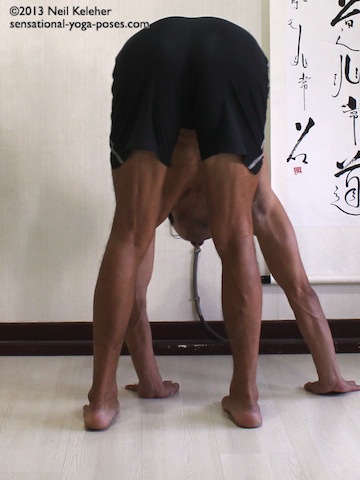
Bend forwards and place hands on floor or on leg. Shift weight to one foot, other leg relaxed. Hold then switch to other leg. Repeat a few times. Then with weight on one leg practice the Warrior 3 vinyasa which is next.
Bending forwards with all of your body weight on your right leg, touch both hands to the floor just in front of your right foot. If you can't touch the floor then bend your right knee.
- Lift your hands and slowly reach both arms back. (Shift weight to foot first.)
- Slowly touch both hands to the floor again.
Repeat a few times and then switch legs.
Then slowly stand up.
(To relax your lower back, do a forward bend before standing up.)
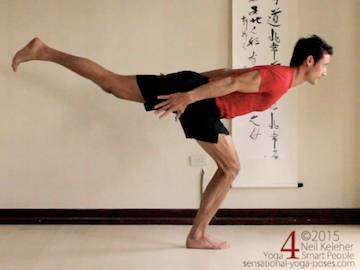
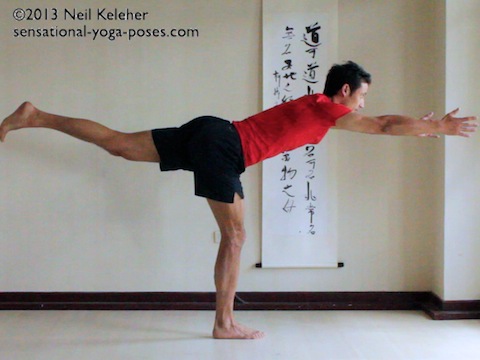
For the next part of the beginners yoga workout you can practice entering warrior 3 yoga pose from standing.
With feet parallel, shift your weight on to your right leg. Reach your left leg back and point your knee down. Tilt your pelvis so that your leg and torso are horizontal (or work towards this.) Then make your neck feel long. Reach your hands forwards and slowly try to touch your hands together.
If you can touch your hands, hold for a second and then slowly release. If you repeat this yoga workout a few times then work at holding the pose with your hands together for longer and longer.
The following exercises done slowly and smoothly can improve strength, flexibility and coordination. Even if you can't do them slowly and smoothly initially, work towards it.
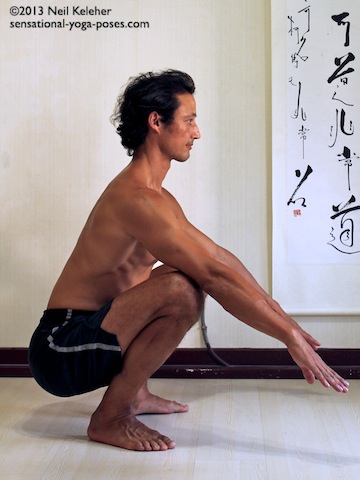
Squats are a simple way to build leg strength and heat. They can also make the following poses seem less difficult.
For the following yoga workout set, repeat each a few times before moving on to next squat variation.
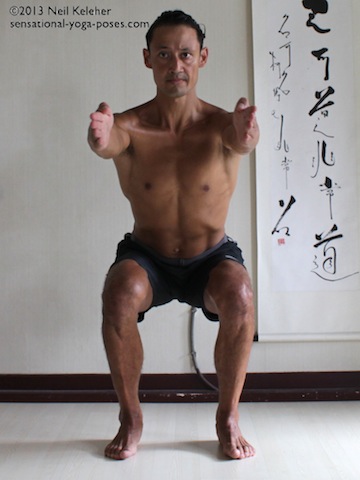
Squat with feet apart, bum on your heels. Heels on the floor.
- Lengthen your spine,
- reach your arms forwards,
- lift butt to knee height,
- reach butt back so that knees are over feet (chest reaches forwards.)
- slowly sink back down.
Rest a moment and then repeat a few times. Moving both up and down slowly and smoothly.
If knees are injured or painful then skip the next two squat variations, or try a partial weight shift.
If you repeat the squat over the course of several beginners yoga workouts, you can then gradually work at shifting more weight on to one leg.
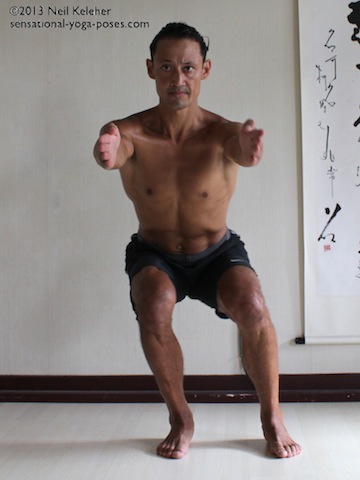
Using same exercise as before, follow the same steps to lift your pelvis,
- then shift weight to right leg, pause,
- shift to other left leg, pause
- return to center, slowly sink down.
Rest a movement and then repeat.
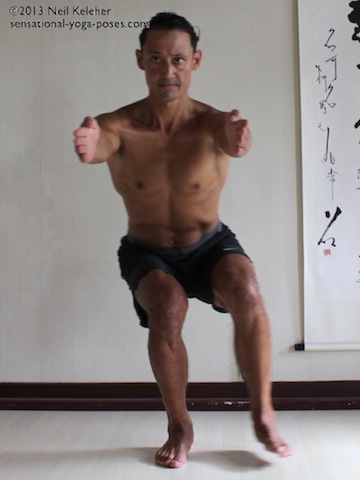
Using same exercise, after shifting weight to one foot, lift the other foot.
Again, avoid if you have knee pain. If working towards this over the course of several beginners yoga workouts then first work at relaxing the leg you are trying to lift. Make your supporting leg strong. Once you can lift one leg, work at holding for a few seconds. Also work at slowly lifting and lowering the leg.
After the last squat, instead of sinking down, slowly stand up. Pause at the half way point and then stand completely.
Rest and rejoice for a few moments.
This set of vinyasa's works toward revolved (twisted) triangle.
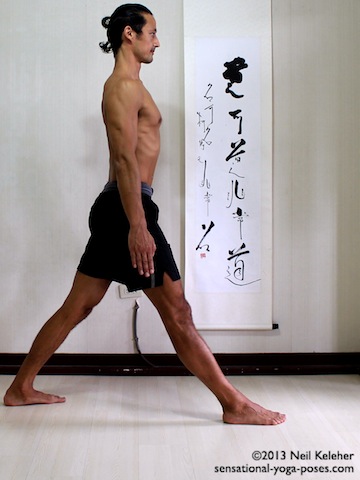
Standing with feet parallel, step your left foot back so that feet are about a leg's length apart. Turn your left foot out. Turn your hips so that your pelvis is facing in the same direction as your right foot.
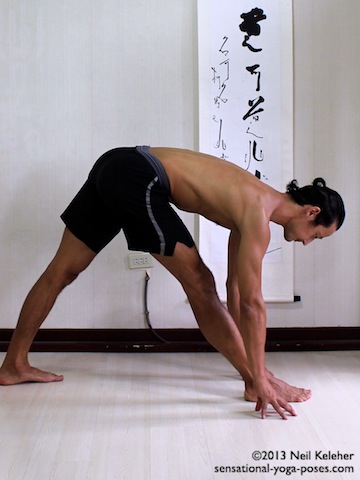
Slowly bend forwards and let your arms hang down as you do so.
Slowly stand up. Use your legs to control your body both as you bend forwards and as you stand up. Repeat a few times doing move actions slowly and smoothly.
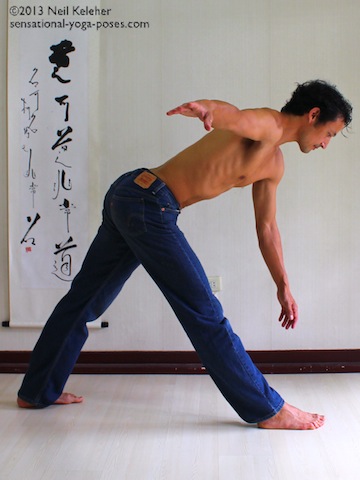
Then as you bend forwards reach your right arm to the right. As you stand let both arms hang by your sides. Next, as you bend forwards, turn your ribcage to the right, reach your right arm up and your left hand down. As you stand let your arms hand down by your sides and turn back to the front.
Finally, bend forwards and twist and hold the pose with left hand on the floor or your right shin and right hand reaching up. Feel your waist and make both sides of your waist feel long. Feel your ribs and open the spaces between your ribs. Feel your neck and make both sides of your neck feel long.
Stand and then repeat on the other side.
Remember to move slowly and smoothly, both while bending forwards and twisting and while standing up.
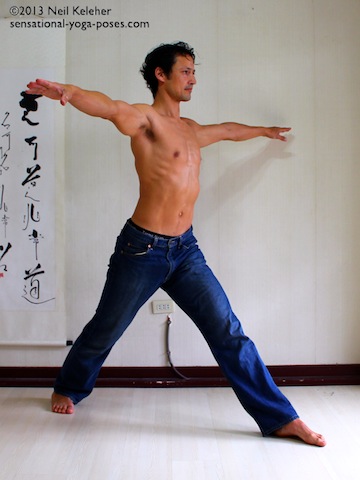
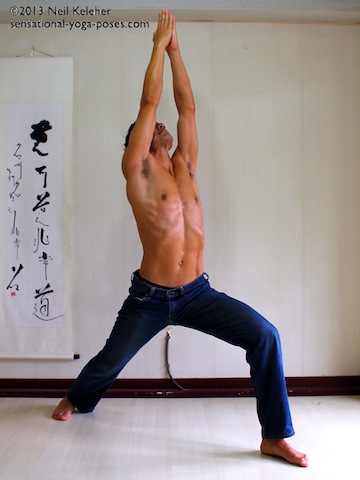
For the following Warrior 1 vinyasa start with feet parallel. Step your left foot back, further than you did when doing the previous pose (twisting triangle.) Turn your left foot out slightly.
Stand with both knees straight and pelvis turned towards left.
- Slowly turn your pelvis to the front so that it faces the same direction as your right foot.
- Slowly bend your right knee.
- Slowly straighten your knee.
- Turn your pelvis to the left again.
Repeat a few times.
As you bend your knee try to get your thigh level and your shin vertical.
- Adjust the distance between your feet as you need to.
- Also feel free to adjust the position of your back foot as required. (Keep the heel on the floor and the back knee straight.)
Next add the arms.
- As you turn your pelvis lift your arms out to the sides, shoulder height.
- As you bend your knee lift your arms up over your head.
- As you straighten your knee, reach arms to the sides.
- As you turn your pelvis, lower your arms.
Repeat a few time. Make all your movements slow and smooth. Synchronize arm movements with the movements of your legs and pelvis.
Repeat on the other side.
Afterwards, kneel down for the next exercise.
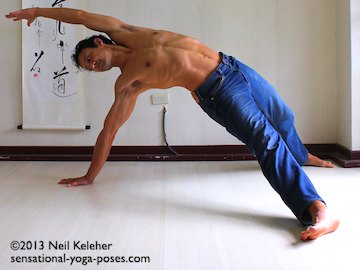
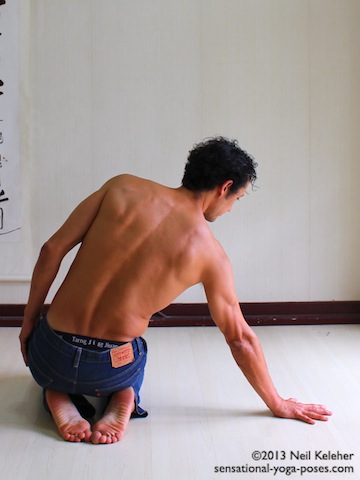
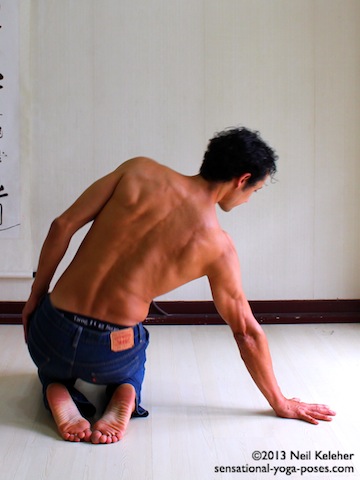
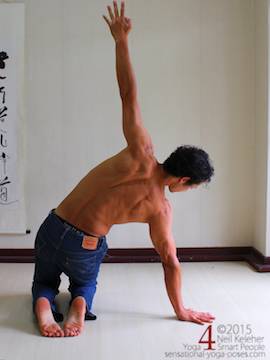
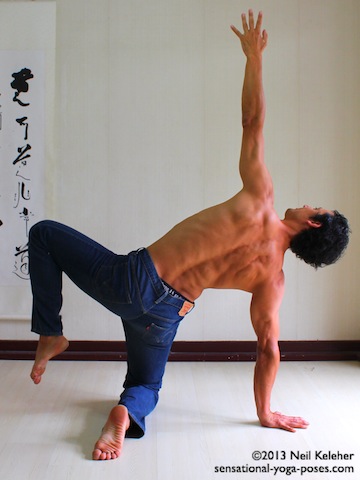
This next exercise works on the side of the thighs and also develops shoulder and fingers awareness.
From kneeling position, place right hand on floor beside you and then lift your pelvis. Use the following steps prior to lifting:
- Use right shoulder to lift chest.
- Press fingers of right hand into floor.
- Press right shin into floor and lift your pelvis.
- Slowly lower
Repeat a few times, switching sides each time.
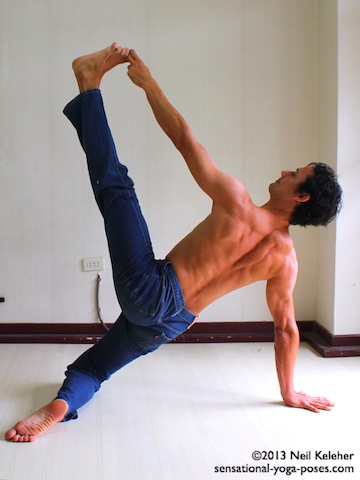
After a few repetitions you can do the following:
- with pelvis lifted, lift top knee and reach it upwards
- with pelvis lifted grab big toe of top leg and extend leg upwards.
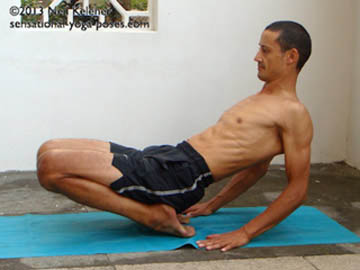
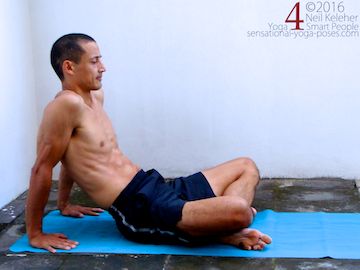
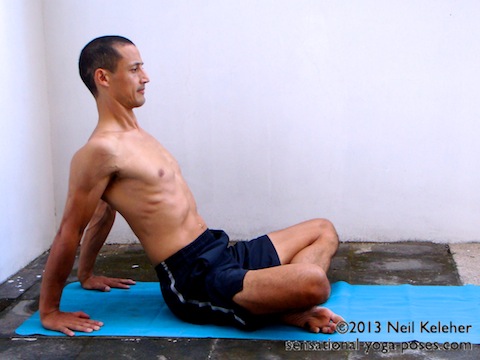
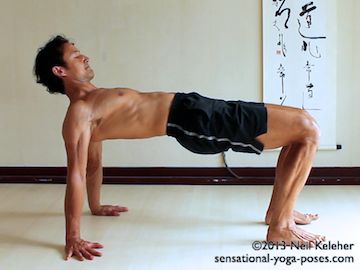
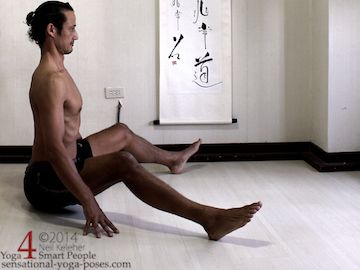
In the previous yoga pose you used your arm to the side to support part of the weight of your body. In table top yoga pose the arms are behind you and supporting part of your body weight.
Sit with feet on floor (or legs can be crossed to begin with). Place hands on floor behind you, fingers point forwards.
- Move shoulders back.
- Lift your chest.
- Press your fingers into the floor.
With feet on the floor and parallel to each other
- press feet into floor to lift pelvis.
- Press your forefeet and heels into floor.
- Also press your toes into floor. (In the picture below my left big toe is lifted!)
Hold, while gradually pressing your ribcage and pelvis higher.
Slowly release.
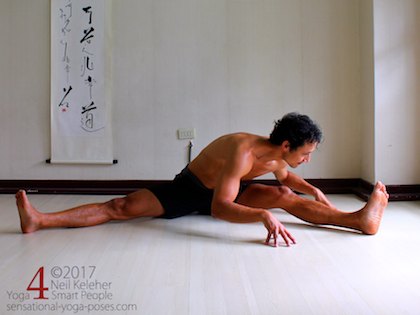
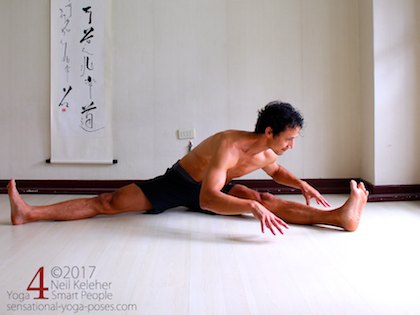
For this pose you can practice using leg tension to both strengthen and stretch your legs.
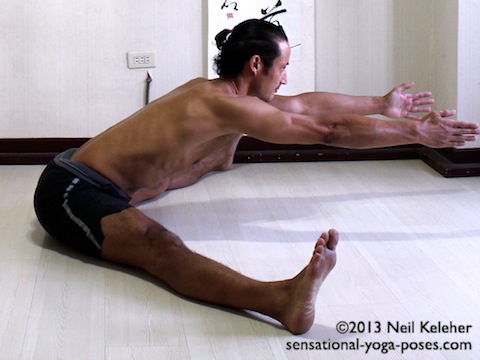
Note, if forward bend isn't happening, you can sit on blocks to do forward bend or work on screaming pigeon instead.
- Sit with legs straight and separated about 90 degrees (90 degrees between legs, not 90 degrees form center line to each leg!)
- Turn your ribcage so that it faces your right leg.
- Slowly bend towards right leg. Notice increase tension in leg.
- Actively press right leg into floor
- With leg still pressing down, lift hands and then reach your hands forwards. Hold for a moment.
- Either do one long hold each side, or
- briefly hold each side and repeat a few times, holding for longer on last rep.
Remember to press leg into floor. You can also pull upwards on other leg.
For this yoga pose, initially try lifting your pelvis a few inches off of the floor. Then as you repeat to each side, work at lifting your pelvis higher. This yoga pose can be used to work on both the inner thighs and the outer thighs.
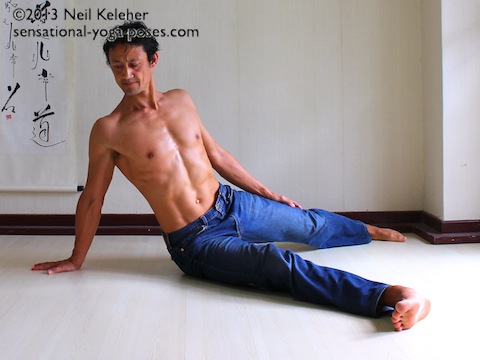
Seated with legs still wide, turn both legs to the right, and place right hand on the floor behind you.
- Press fingers into the floor.
- Use your shoulder to lift ribcage.
- Use both legs to lift pelvis.
Slowly lower and repeat on other side. Each repetition work at lifting your pelvis higher.
You can reach free arm back, over your head, and also work at making the front of your chest feel open.
For seated wide leg forward bend sit with legs wide. Bend forwards with hands or elbows on the floor. To lift arms:
- Press legs down.
- Reach chest away from pelvis.
- Slowly lift arms.
- Slowly reach arms forwards (but keep off of floor.)
Lower hands rest legs, then repeat.
If you can't bend forwards then do this pose with the knees bent.
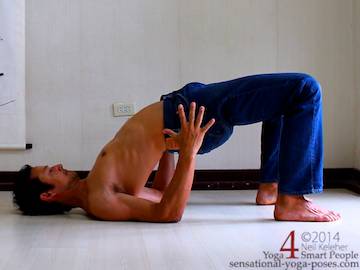
For bridge yoga pose lay on back with knees bent and feet on the floor. Reach arms forwards, bend elbows and point forearms up (but elbows are still on the floor.)
Press feet into the floor to lift hips. Press elbows into the floor to open chest. Move chin towards chest (open back of neck.)
Press heels, forefeet, toes and elbows down into the floor.
Hold and then slowly release. Optionally for a beginners yoga workout, lower the pelvis slightly and then press it back up. Do both actions slowly and smoothly.
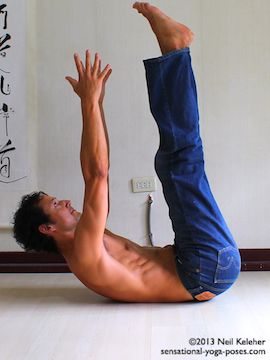
While laying on back, reach legs and arms up. Lift pelvis off of floor. Lift upper back and head off of floor. Hold. (Keep hands away from legs.)
Rest and then roll up to a squat.
For fun try to roll up to a squat without using your hands.
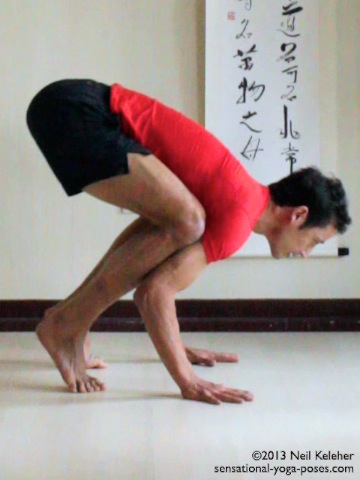
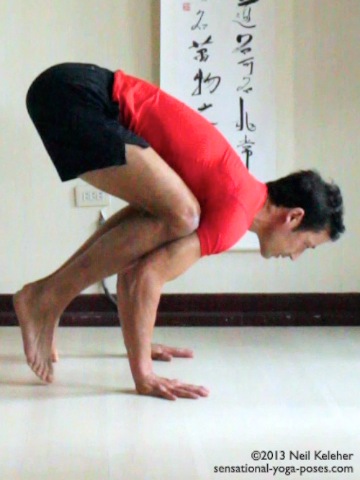
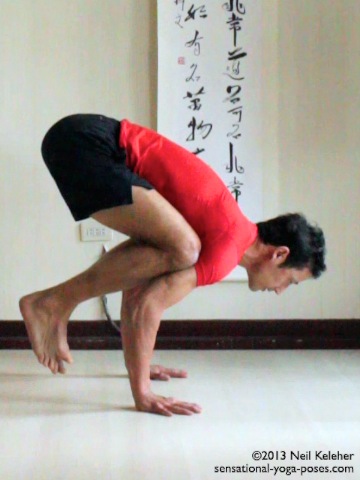
For crow pose, squat with upper arms in front of shins, elbows bent, palms on floor. Point elbows back with knees to outside of arms. Lift hips, shift hips forwards so that shins press into upper arms. Move hips forwards more until feet feel empty, then lift feet. Then rock back onto your feet.
Once you get the balance, for a beginners yoga workout, practice rocking forwards into crow yoga pose and then back into a squat.
Lay down and hug knees to chest.
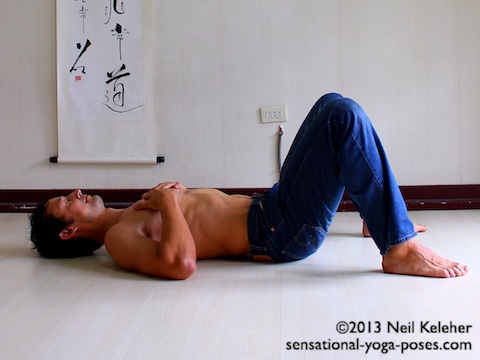
Then bend knees and place feet on the floor, hands on your heart.
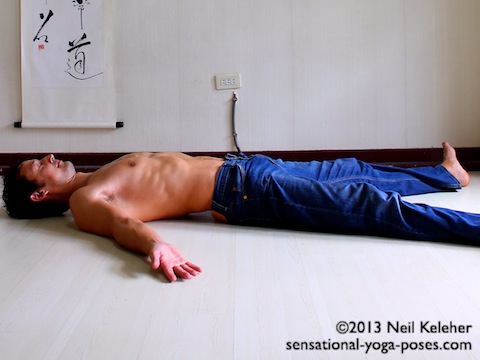
Then straighten legs and arms.
With legs separated, let your legs roll out.
Tuck shoulder blades beneath you, spread arms slightly out to the side, palms up.
Move the back of your head back away from ribcage so that chin is slightly pulled inwards, towards chest and back of neck feels long.
Rest for a few minutes with eyes closed.
Then slowly sit up, and spend a few moments with hands in prayer.
End of practice.
Published: 2013 05 07
Updated: 2023 03 25
